How to Measure a Chainsaw Chain: Pitch, Gauge and Drive Links
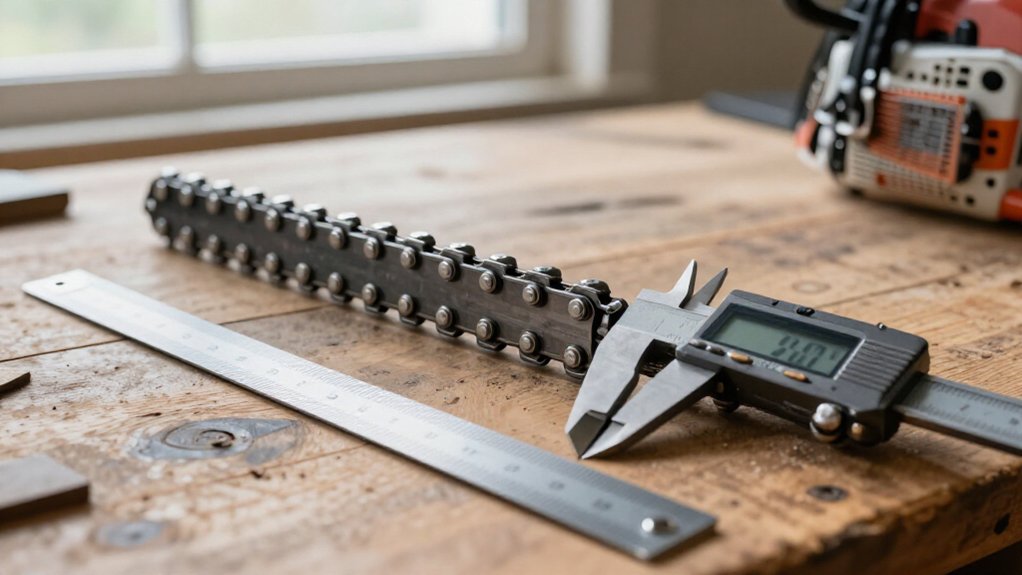
To measure a chainsaw chain, switch off saw, engage its brake, and disconnect the spark-plug lead or battery; wear gloves.
Measure pitch from the center of the first rivet to the third across three rivets, then divide by two. Use calipers to measure gauge across a drive link’s flat sides, and count each drive link around the loop.
Match the three measurements to the manual and sprocket. Next, you’ll learn to verify fit and prevent errors.
Locate Chain Markings
First, check the guide bar near its tail for the chain’s pitch, gauge, bar length, or replacement code. If you find these markings, compare them with the chain specifications required for your saw. The bar may show more than one code, so use the model and bar information to identify the compatible chain.
When markings are missing, worn, or difficult to read, consult your chainsaw’s operator’s manual for the specified chain size. You can also check the drive sprocket or clutch drum for a pitch marking. Match that value to the manufacturer’s specification rather than estimating from appearance. If the available information doesn’t let you confirm the correct pitch and gauge, contact a chainsaw dealer. Share your model so the dealer can verify compatibility.
Inspect Chain Markings
If the guide bar markings don’t confirm the chain size, inspect the chain’s drive links for stamped codes.
Check the bar’s tail for a stamped pitch, gauge, or replacement code. Examine each drive link closely; X-CUT stamps may encode both dimensions. In that system, “8” means 3/8-inch pitch and “5” means 1.5 mm (.058-inch) gauge. Read each character carefully; dirt, wear, or shallow stamping can obscure digits. Use good light and compare the code with the manufacturer’s sizing information. Treat markings as identification clues, then verify pitch and gauge against the saw’s specified chain before choosing a replacement.
- Look for a crisp number on a flat drive-link surface.
- Compare the stamp with the chain’s measured profile.
- Check the drive sprocket or clutch drum for matching codes.
- Use the operator’s manual when marks are missing or unclear.
Step 1: Secure Chain Before Measuring
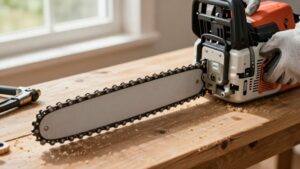
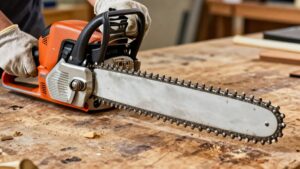
Before measuring, switch off the chainsaw, disconnect the spark-plug lead or battery, and engage the chain brake. Confirm the saw can’t start before you touch the chain; never measure or handle it while it moves. Put on protective gloves because the cutters stay sharp even when the saw is off.
Keep the chain seated in the guide-bar groove and steady the bar as you inspect markings or count drive links. This prevents chain movement from changing your count and keeps the chain aligned for inspection. If you need to remove the chain for measuring, release its tension first, then lay it flat on a stable surface. Don’t pull or reposition a tensioned chain. Verify the brake remains engaged and power stays disconnected throughout the check.
Step 2: Remove the Spark Plug-vesm
Switch off the chainsaw and let it cool, then remove the spark-plug boot and keep it clear of the plug while you work.
For a gas-powered saw, this step reduces the risk of accidental starting while you handle the chain. Don’t simply rely on the switch; disconnecting the ignition circuit provides a safeguard. Keep the boot away from the plug throughout the inspection or measurement, so it can’t make contact accidentally. If you use a battery-powered chainsaw, remove its battery instead of looking for a spark-plug boot.
Set the battery aside where it can’t be reinserted inadvertently. Don’t reconnect the boot or reinstall the battery until you have finished work on the chain. Restore the power source only when you’re ready to resume operation.
Step 3: Measure Rivet Center Spacing
Measure the chain’s pitch by aligning a ruler or caliper with the centers of the rivets. Measure between two adjacent rivet centers. For greater reliability, span three consecutive rivets: place the measuring tool’s starting point at the center of the first rivet and its endpoint at the center of the third. Divide this distance by two to calculate pitch, because the span covers two equal intervals.
Keep the ruler or caliper aligned through the rivet centers. Don’t measure from rivet edge to rivet edge; that method can produce an inaccurate result.
Compare your calculated pitch with the markings on the chain or guide bar. Common sizes include 1/4 in., 3/8 in. LP, .325 in., 3/8 in., and .404 in. Confirm that the marking matches your calculated pitch.
Step 4: Measure Drive-Link Thickness
After confirming the chain’s pitch, check its gauge by measuring the thickness of a drive link—the underside section that sits in the guide-bar groove. Use a digital caliper for a direct reading. Position the caliper’s jaws across the link’s flat sides, perpendicular to its length, and close them gently until they touch without squeezing. Read the measurement in inches or millimeters, and note the unit.
Common chain gauges include .043, .050, .058, and .063 inches, corresponding to about 1.1, 1.3, 1.5, and 1.6 mm. Wear or damage can make a link’s edges difficult to measure accurately. If the caliper reading seems unclear, inspect the number stamped on a drive link or guide-bar markings for a clearer identification and a stable, repeatable measurement.
Step 5: Compare Measurements to Specifications
Once you’ve measured the chain, compare its pitch and gauge, along with its drive-link count, to the guide-bar markings or owner’s manual.
Confirm that the pitch matches both the drive sprocket and bar-nose sprocket specifications; these components must use the same pitch as the chain. Check the gauge by comparing drive-link thickness with the guide-bar groove specification, such as .050 inch or .063 inch. Then verify that your counted drive links match the specified chain length. A mismatch can leave the chain too short to fit or too loose to tension correctly. For example, 3/8 LP / .050 / 62DL specifies 3/8-inch low-profile pitch, .050-inch gauge, and 62 drive links. Compare each value with the bar markings or manual before fitting the chain.
Step 6: Brush Debris From Drive Links
Before inspecting or counting the chain, brush dirt and sawdust from the full loop, especially the lower part of each drive link that fits into the guide-bar groove. Use a clean, dry brush to loosen packed debris. Work around the entire loop, clearing each link rather than only the visible section. Debris can hide the lower surface that fits the guide-bar groove and determines gauge, or obscure stamped size markings. Clear it before reading numbers so residue doesn’t confuse a marking with dirt.
Check that every link is visible before counting. Follow the full loop in sequence, keeping track of each drive link. Removing debris first helps you avoid skipping a link or counting one twice during your careful chain measurement and inspection process.
Test Chain Fit
Test chain fit by checking that its pitch matches both the saw’s drive sprocket and the guide-bar nose sprocket, if present. Next, compare the drive-link thickness, or gauge, with the width of the guide-bar groove. Then verify that the drive-link count matches the bar’s specified chain length; bar length alone doesn’t confirm fit.
Before installation, lay the chain beside the bar and identify its pitch, gauge, and link count from markings or a reliable specification. For example, two 16-inch chains may differ: one could be 3/8 LP, .043 gauge, and 56 drive links; another could be .325 pitch, .050 gauge, and 66 links. A mismatch in any of these specifications can keep the chain from seating, tensioning, or traveling smoothly on the guide bar.
Troubleshooting Measurement Errors
If your chain measurements seem inconsistent, check how you took them: measure pitch across three consecutive rivets, then divide by two, and measure gauge at the drive link’s lower portion that sits in the bar groove. If wear obscures the gauge, check the drive-link stamp or consult your bar markings or manual.
| Error | Correction |
|---|---|
| Pitch | Measure across three rivets, not two. |
| Gauge | Measure the drive link, not chain body. |
| Wear | Verify stamped size or consult manual. |
| Count | Count every drive link around loop. |
Finally, verify pitch, gauge, and drive-link count together; don’t infer count from bar length. A mismatch in any measurement can stop the chain fitting correctly, even when the other two match. Recheck each value before choosing a replacement chain assembly.
Lubricate Chain After Measuring
After measuring the chain, lubricate it with the bar-and-chain oil specified in your saw’s operator’s manual. Before you start, fill the reservoir with the recommended oil and secure the cap. Don’t use another lubricant unless the manual permits it. Start the saw and briefly observe the chain’s oiling.
Oil should reach the chain and guide-bar groove. Keep clear of the moving chain and follow the manual’s test procedure. Check delivery before cutting and periodically during use as needed. If the chain or groove stays dry, stop the saw and check the reservoir and oiling system before cutting.
Stop the saw and wait until the chain stops before inspecting or adding oil. Keep the reservoir filled during use to lubricate the moving chain and bar.
Conclusion
You’ve measured the chain’s pitch, gauge, and drive-link count—now compare all three with your saw’s manual or bar markings before buying a replacement. If the markings are unclear or your measurements don’t match a standard size, ask a dealer to verify them rather than guessing. Reinstall the chain correctly, tension it to the manufacturer’s specification, and lubricate it before use. A properly matched, fitted, and lubricated chain helps your saw cut safely and reliably.
Chainsaw Bar, Chain & Sprocket Fitment Chart
Look up bar lengths, chain pitch, gauge, drive links and sprocket for listed Husqvarna and STIHL saws, or find saws by pitch and gauge.
Chainsaw Chain Speed Calculator
Turn RPM, drive sprocket teeth and chain pitch into chain speed in ft/s, m/s, mph or km/h, and compare 7- vs 8-tooth sprockets.
Chainsaw Chaps Size Calculator
Enter your belt-to-boot length, waist and chap style to see the matching size in STIHL, Labonville and Husqvarna size tables.
Chainsaw File Size Finder
Pick your chain pitch or type the number stamped on your chain to see the round file size STIHL and Oregon publish for it.
Chainsaw Mill Bar Length & Max Log Width Calculator
Find the widest log your bar can mill after your mill's allowance, or the bar length you need for a given log, in inches or mm.
Matterhorn Chainsaw Boots Size Chart
Find your Pfanner Matterhorn chainsaw boot size (EU 39–48) from foot length or a US, UK or EU shoe size, using Pfanner's published charts.