How Often to Replace a Chainsaw Chain? Signs It’s Worn Out
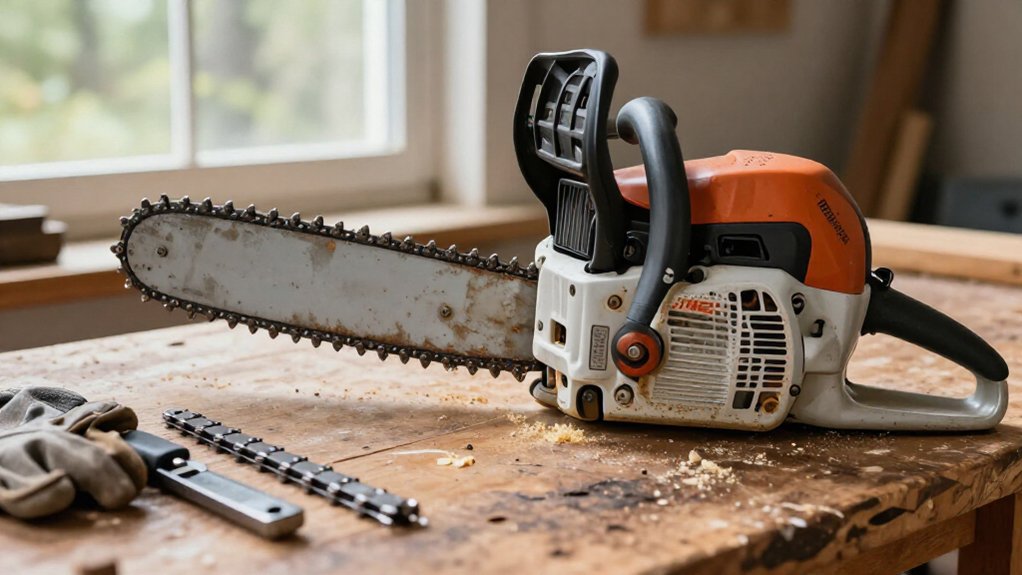
You don’t replace a chainsaw chain on a schedule: occasional use may let it last years, while daily cutting, dirt, and sharpening wear it faster.
Inspect it at refueling and after striking debris. Replace it when a cutter reaches its wear mark, parts crack or break, or it won’t hold tension.
Fine sawdust, smoke, or cutting that requires extra pressure signals dullness; stop and inspect.
Match pitch, gauge, and link count to your saw and bar. The checks below help you assess wear.
Occasional vs. Daily Sawing
A chainsaw chain has no fixed expiration date: if you cut firewood occasionally and maintain it properly, it can last several years or even decades, while a frequently used chain may still last more than five years.
Your replacement interval depends on cutting conditions, sharpening frequency, and care. Most chains can be sharpened about five to ten times before their cutters reach wear markers, but hard wood and frequent sharpening can shorten service life. If you saw daily, expect faster wear and more frequent sharpening; replace the chain when cutters reach those markers or damage prevents you from sharpening them evenly. Inspect after sessions, and stop immediately if the chain strikes dirt, rock, or metal: impact damage may require replacement before you resume cutting.
Required Chain Specifications
Before replacing a chain, confirm that it matches your chainsaw and guide bar. Use the specification recommended for your saw and bar; STIHL saws are designed for approved bar-and-chain combinations. Don’t select by chain length alone. Check each required measurement before fitting a replacement.
- Match pitch, the spacing between chain rivets.
- Match gauge, the drive-link thickness for the bar groove.
- Count drive links; the correct total must fit your bar.
- Use sharpening equipment and a method suited to that chain.
- Replace chains with cracked cutters, broken drive links, or missing parts.
Keep cutters uniform and set depth gauges correctly when sharpening. Don’t repair and reuse a damaged chain; failure can cause serious injury. Ask a STIHL Approved Dealer to verify compatibility and supply official parts.
After Each Refueling
Each time you refuel, inspect the chain before cutting: look for cracked or broken cutters, missing parts, and cutters at their wear markers. If the chain’s intact, file a few strokes at each fuel fill when needed, while cutters remain above their wear marks. In wood, a sharp chain pulls itself into the cut and produces large chips.
If you must push or see fine sawdust, stop and sharpen before resuming. Refill the bar-and-chain oil reservoir whenever you fill the fuel tank; poor lubrication can quickly overheat and damage the chain. Replace the chain if it won’t hold proper tension or has severe damage. Stop the saw first.
| Inspection | Response |
|---|---|
| Damage | Replace chain |
| Dullness | Sharpen |
| Oil | Refill reservoir |
Check Cutter Length Indicators
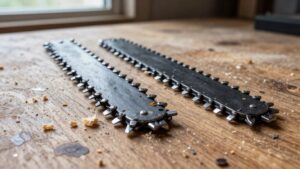
Locate the wear marks on each cutter and beneath it, above the toe and heel, then compare remaining tooth lengths across both sides of the chain. Sharpening removes steel and chrome plating, so don’t file past a mark or leave damaged cutters uneven. Replace the chain when any cutter reaches its service limit or you can’t restore uniform lengths safely.
Find The Cutter Marks
Check the stamped wear or service mark on each cutter; it indicates the minimum safe cutter length. Locate the mark before sharpening, and keep every cutting edge above it. If filing brings a cutter down to its mark, the chain has reached its replacement limit; don’t keep sharpening or run it. Filing past the mark leaves a shortened cutter that may cut poorly and is more likely to break.
Inspect cutters across the chain for consistent length and damage. A damaged or shorter tooth can contribute to vibration and chain snatching, so replace the chain rather than continuing to use it. On some STIHL chains, check beneath the cutter, above the toe and heel, for a wear mark. Replace the chain if wear reaches that mark.
Measure Remaining Tooth Length
As you sharpen, steel and chrome wear away, shortening the cutters. Check each cutter’s stamped wear marker before filing. The marker defines the minimum usable cutter length; when a cutter reaches it, replace the chain rather than continuing to remove material.
Filing past this limit leaves too little cutting edge and can reduce performance. It also increases the chance that a tooth will break under load. Inspect the markers under good light and clear away packed sawdust or oil so you can see the stamped line.
Use a clean cloth, and avoid touching sharp edges with bare fingers. If damage means you can’t restore a cutter without crossing its marker, replace the chain. Don’t try to gain extra life by filing below the limit.
Compare Teeth Consistently
Compare cutter teeth across the chain: they should be close to the same length. Uneven or markedly shortened cutters can make the chain vibrate and snatch during a cut, so compare several teeth rather than judging one in isolation. Inspect each cutter’s stamped wear indicator and the underside marker above its toe and heel; these references show how much usable cutter material remains. Keep your filing consistent, and don’t file beyond a cutter’s stamped limit.
If several teeth are broken or shortened so far that you can’t sharpen them to a uniform length, replace the chain. Otherwise, you may keep using a chain whose cutters remain above their wear indicators and retain enough material for sharpening, provided you’re not seeing significant damage or abnormal wear.
Replace At Minimum Marks
When sharpening has shortened a cutter to its minimum mark, replace the chain rather than filing further. Inspect the stamped wear marker beneath each cutter, above its toe and heel. Sharpening removes steel and chrome plating, so each cutter gradually shortens until it reaches the indicator. Don’t file past that line: an over-shortened cutter cuts poorly and may break off during operation.
Use the marker as a clear replacement limit, not a target for continued sharpening. While filing, keep cutter lengths uniform to maintain consistent cutting action. If damage or wear prevents you from bringing the cutters to a uniform length without crossing a minimum mark, replace the chain. At the limit, stop cutting and install a properly matched replacement before resuming saw operation.
Check Both Chain Sides
Inspect cutter wear indicators on both sides of the chain, including the underside of each cutter above its toe and heel. These markers show when each tooth has reached its sharpening limit. Check each cutter; don’t judge wear from one side. If any cutter reaches its marker, replace the chain. Filing beyond that point can weaken the tooth and raise the risk of breakage.
Compare cutter lengths across the chain. Keep teeth uniform so the chain runs; uneven cutters can cause vibration and chain snatching. If a cutter is broken or shortened and you can’t sharpen it back to a uniform length, replace the chain. Before inspecting, shut off the saw, engage the chain brake, and wear cut-resistant gloves. Don’t use a chain with a reached marker.
Cutting Dirty, Soil-Covered Wood
Soil’s abrasive silica and grit can strip your chain’s cutting edge almost instantly on contact. Brush mud and soil from logs, keep the chain clear of the ground, and maintain proper lubrication to reduce heat and wear. If the chain strikes soil and smokes or stops cutting, stop work and inspect it; sharpen cutters above their wear markers, but replace any chain with cracked, broken, or marker-worn teeth.
Abrasive Dirt Damage
Because soil contains abrasive silica and tiny rocks, a chain can dull quickly, even after one strike against the ground. When you cut dirty wood, you may see fine sawdust rather than large chips, and the saw may need extra pressure. Stop immediately if the chain contacts soil or no longer cuts cleanly; continued operation creates heat that can damage the chain and guide bar.
Don’t force a dull chain through the cut.
Before cutting, brush mud and dirt from logs, and keep the bar and chain clear of soil. Inspect cutters for chips, cracks, or broken edges after a ground strike. If damage has broken or cracked a cutter, replace the chain. Replace it as well when proper sharpening no longer restores effective cutting.
Faster Chain Wear
Even without striking the ground, cutting soil-covered logs can dull a chain quickly. Soil contains silica and abrasive particles that wear cutting edges when they contact the chain, even if you haven’t hit the ground. Watch the cut: a sharp chain pulls itself into wood and throws chunky chips.
A worn chain produces fine sawdust and makes you press harder. When you see sawdust, stop cutting and sharpen the chain; don’t force it through the log. Extra pressure creates heat, which can damage the guide bar and engine. If soil or rocks break cutters or cause severe damage, replace the chain rather than continuing to cut. Continued use of damaged cutters risks poor cutting performance and added strain on the saw and reduced control.
Preventing Soil Contamination
Brush mud and soil from logs with a wire brush before cutting; abrasive silica can blunt cutters quickly. Keep your chain clear of the ground, particularly as you finish a log resting on soil. If the bar or chain strikes ground, rocks, or embedded debris, stop the saw and inspect the cutters.
A ground strike can strip a cutting edge immediately; the damaged chain may produce fine sawdust or smoke instead of clean chips. Don’t continue cutting through this warning sign, because use can increase heat and wear and compromise control. Replace the chain if inspection shows severe damage or cutters that can’t be restored by sharpening. Keep the chain lubricated with bar and chain oil; lubrication reduces friction, heat, and wear during cutting.
Clean, Coarse Wood Chips
When a chain is sharp and healthy, it cuts cleanly and produces large, coarse wood chips, not fine sawdust. These chips show that the cutters are biting effectively and the chain is moving through the wood without excessive pressure. If you notice fine sawdust instead, stop cutting; don’t force the chain through the work.
A dull chain can demand greater effort and may cut unpredictably. Sharpen it according to the manufacturer’s instructions, then make a controlled test cut in suitable wood. The chain should again produce coarse chips and pull itself into the cut with minimal pressure. Treat chip size as a performance clue, not the only replacement test. Inspect cutters for wear marks or damage; replace the chain if it can’t cut safely and effectively.
Excessive Chain Stretch
A chain’s cutters may remain sharp while wear in its rivets and drive links causes excessive stretch. Chains naturally lengthen as these parts wear, so occasional tension adjustments are normal. Replace the chain if it repeatedly loosens soon after adjustment or you can no longer maintain proper tension.
Check tensioner position and chain sag. If the tensioner reaches its maximum setting and the chain still sags below the guide bar, replace it; it’s stretched beyond its usable limit.
Worn drive links can impair tracking and accelerate guide-bar wear. Don’t keep cutting with a chain that won’t stay properly tensioned, since poor tracking and slack can increase the risk of derailment and injury. Never remove links to shorten a stretched chain; that weakens the chain loop.
Preventing Premature Chain Wear
To prevent premature chain wear, keep the chain clean, lubricated, and properly sharpened. Before cutting, inspect logs for nails, screws, or staples, and brush away mud; dirt, rocks, and embedded metal can damage cutters. Use these practices:
- Check bar-and-chain oil whenever you refuel; low oil can overheat and damage the chain.
- Sharpen with the correct filing equipment, and stop before cutters reach their wear markers.
- Avoid excessive filing, which removes metal and shortens chain life.
- Turn the guide bar over when you change the chain to promote even rail wear.
- Stop if the chain makes fine sawdust or needs pressure; sharpen it instead of forcing the cut.
Keep the saw switched off; follow manufacturer’s instructions while sharpening. Work safely. Wear appropriate protective equipment always.
Adjust Checks for Seasonal Use
Before seasonal cutting begins, inspect the chain for cracks, broken or missing teeth, and cutters worn to their service marks; replace a damaged or worn chain before use.
During active cutting, assess performance regularly. Large chips and a chain that pulls itself into wood indicate effective cutting; fine sawdust or pressure to advance means sharpening is due.
After striking soil, rocks, nails, or another hard object, stop the saw and inspect the chain immediately; one impact can severely damage cutters.
Check tension and lubrication throughout the season. If the chain repeatedly loosens or won’t hold proper tension, replace it.
Before storage between seasons, clean and oil the chain. Inspect it again before next season’s cutting, then confirm tension and lubrication before starting the saw.
Conclusion
Replace your chainsaw chain when its cutters reach their wear indicators, the chain won’t hold proper tension, or damage makes sharpening unsafe. How often that happens depends on how often you saw and whether you cut clean wood or dirt-covered material.
Check chain condition after each refueling, and adjust inspections for seasonal use. Always fit a chain that matches your saw’s required specifications. Before inspecting or replacing it, shut off the saw, engage the chain brake, and wear protective gloves.
Chainsaw Bar, Chain & Sprocket Fitment Chart
Look up bar lengths, chain pitch, gauge, drive links and sprocket for listed Husqvarna and STIHL saws, or find saws by pitch and gauge.
Chainsaw Chain Speed Calculator
Turn RPM, drive sprocket teeth and chain pitch into chain speed in ft/s, m/s, mph or km/h, and compare 7- vs 8-tooth sprockets.
Chainsaw File Size Finder
Pick your chain pitch or type the number stamped on your chain to see the round file size STIHL and Oregon publish for it.
Chainsaw Mill Bar Length & Max Log Width Calculator
Find the widest log your bar can mill after your mill's allowance, or the bar length you need for a given log, in inches or mm.