When to Replace a Chainsaw Sprocket: Rim vs Spur Wear Signs
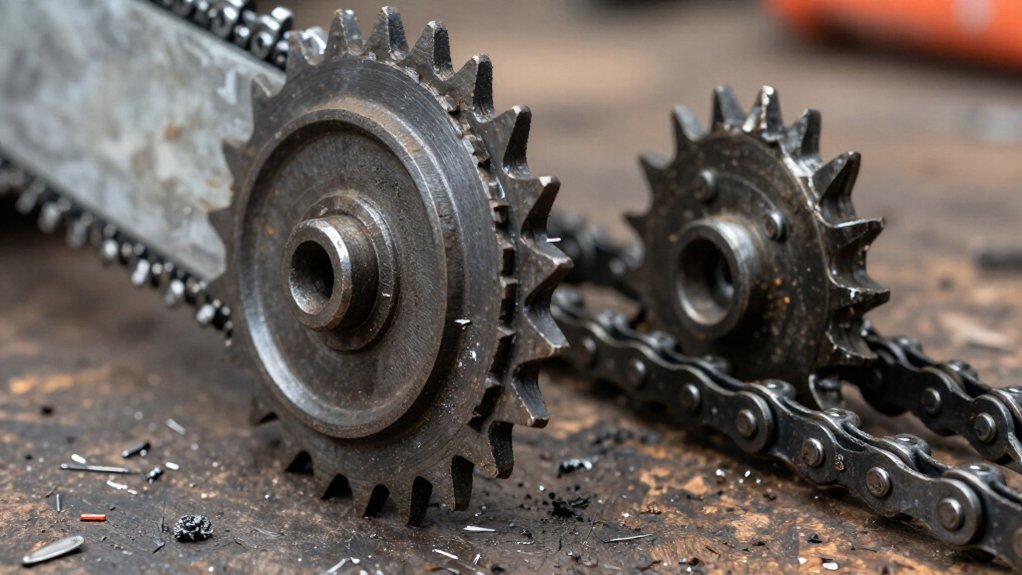
Replace your chainsaw sprocket when its deepest groove reaches about 0.5 mm, or sooner if you find chipped teeth, hooking, or severe damage.
For a spur, inspect tooth faces and valleys; for a rim, check both channels for uneven wear and missing wear indicators. Use a sprocket gauge, not visual judgment alone.
Check after chain changes, and investigate slipping, binding, or derailment. Match sprocket pitch to chain. The checks ahead help you plan replacement confidently.
Rim Versus Spur Wear Signs
Although rim and spur sprockets wear differently, both should be replaced when wear reaches the specified limit.
For a spur sprocket, check for chipped or uneven teeth and deep grooves cut by the chain’s drive links. Light scoring alone can be normal, so don’t treat it as a replacement trigger. A rim sprocket reaches its limit when its marked indicators show excessive wear; on some designs, replace it when the incised lines beside the slots disappear.
Keep the rim’s shape in view: side-to-side warping or channels worn past their indicators mean you should replace it. Wear marks around 0.5 mm also indicate the replacement limit. A rim sprocket replaces separately; a spur sprocket’s integration with the clutch drum may require replacing the drum assembly.
Sprocket Wear Inspection Tools
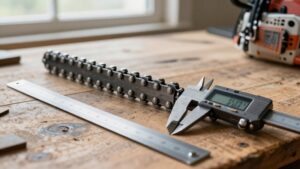
Use a chainsaw sprocket control gauge to check wear on rim and spur sprockets, including those on petrol and cordless saws and pole pruners. Compare the gauge reading with the sprocket’s wear limit; replace it when wear reaches about 0.5 mm.
- On rim sprockets, inspect incised wear lines beside the slots; replace the sprocket if the lines have disappeared.
- Check spur teeth for chips or uneven wear, and look for deep grooves made by chain drive links.
- Confirm rim channels haven’t exceeded their wear indicators; use the gauge rather than judging depth by eye.
Keep the gauge clean and seat it squarely against the specified measurement points, following its markings. These checks give you a repeatable basis for deciding whether the sprocket remains serviceable.
Inspect After Chain Changes
After checking wear with a control gauge, inspect the sprocket whenever you replace the chain, and plan to replace it after about every two chains—or sooner if it’s damaged.
Use a control gauge where applicable; replace the sprocket when wear marks reach about 0.5 mm. After fitting the new chain, stop the saw and turn the chain by hand. It should travel smoothly; binding, clunking, or slipping signals a problem to correct before operation.
| Check | When | Action |
|---|---|---|
| Rim channel | Wear lines disappear | Replace rim |
| Chain movement | After installation | Resolve binding, clunking, or slipping |
Make this inspection part of routine service, not just a response to poor cutting; confirm free chain travel before restarting, and follow the saw maker’s replacement limits for your model during every service.
Check Drive Sprocket Tooth Wear
During regular checks, turn the chain by hand with the saw stopped and inspect the sprocket teeth for chipping, hooking, deep grooves, or binding. Compare wear on spur and rim sprockets, and measure grooves against the maker’s limit; STIHL specifies about 0.5 mm. Replace the sprocket if wear reaches its marks or the chain skips under load, derails, or won’t tension properly.
Inspect Tooth Profiles
Inspect the drive sprocket for chipped, uneven, or hooked teeth; replace it if any teeth are chipped. On a spur sprocket, examine the tooth faces and valleys where the chain’s drive links contact them. Deep grooves indicate excessive wear; light surface scoring is normal and doesn’t alone require replacement.
On a rim sprocket, check whether the channels have worn past their indicators. Confirm the rim remains symmetrical and hasn’t warped from side to side. Use the sprocket control gauge to measure wear, and replace the sprocket when it reaches about 0.5 mm, the stated limit. Don’t judge condition by appearance alone: a worn profile can alter effective pitch, weakening chain engagement and accelerating wear on both the chain and bar. Follow the manufacturer’s guidance before installing a replacement chain.
Check for Hooking
If the chain binds, clunks, slips, or skips as you turn it by hand on a stopped saw, check the drive sprocket for wear. Look for teeth that lean or curve in the direction of chain travel. A hooked profile means the drive links have worn the tooth faces unevenly. Teeth should remain smooth and consistent, though light scoring alone is normal.
Check every tooth on the sprocket. Look for chipped edges or pronounced wear. On a rim sprocket, inspect both channels; they should stay symmetrical and within their wear indicators. If wear reaches the marked limit, replace the rim. Replace a spur sprocket when hooking, chips, or deep chain-link damage appear. Don’t keep running a damaged sprocket: it can accelerate chain wear and cause unreliable engagement.
Measure Wear Grooves
To measure sprocket wear, check the grooves with a control gauge and replace the sprocket when they reach about 0.5 mm, the wear limit.
Inspect the sprocket with the engine off and the chain removed. Clean away oil and debris so the gauge seats squarely in each drive groove. Measure the deepest wear and compare it with the 0.5-mm limit. If any groove reaches that depth, replace the sprocket; don’t wait for chain skipping or poor tracking.
For a rim sprocket, inspect the incised lines beside the slots; replace it when those lines disappear. Check that its channels stay symmetrical and aren’t warped sideways.
On a spur sprocket, look for smooth, consistent teeth. Some scoring is normal, but deep grooves from chain drive links or chipped teeth signal excessive wear or damage. Pronounced grooves can alter chain fit and speed wear on the chain and guide bar quickly.
Compare Rim and Spur Wear
Wear patterns differ between rim and spur sprockets, so check the parts that contact the chain. On a spur sprocket, inspect the teeth and the grooves where the chain’s drive links run. Look for chipped or uneven teeth and deep grooves; light scoring alone can be normal.
With a rim sprocket, examine both chain channels for wear marks. Marks near 0.5 mm or missing incised indicators show substantial wear. Check that the rim stays symmetrical and hasn’t warped side to side. Use a control gauge to assess wear consistently.
If the sprocket is badly worn, you may notice chain slipping or skipping, difficult tensioning, and faster chain and guide-bar wear. Compare the observed profile with the correct chain pitch and gauge before selecting a compatible part for your saw.
Replace Worn Sprockets
Replace the drive sprocket after about every two chains, or sooner if you find damage or excessive wear. Inspect its teeth whenever you service the chain. For a spur sprocket, replace it if teeth are chipped or uneven, or if chain drive links have cut deep grooves; light scoring alone may be normal. For a rim sprocket, use the wear gauge and replace it at the marked limit, about 0.5 mm on STIHL’s control gauge, or when its wear lines disappear.
Worn teeth can make the chain slip, skip, or derail, and can quickly wear a new chain and guide bar. With the saw stopped, check regularly that the chain moves smoothly by hand; replace the sprocket if it binds, clunks, or slips. Inspect carefully.
Cold-Weather Sprocket Checks
Before a cold start, clear ice and packed snow, then check that your stopped saw’s chain rotates by hand with little effort. Inspect the sprocket for worn channels, chipped teeth, or deep grooves; replace it if wear reaches the marked limit or damage is present. Cold weather doesn’t change the interval: replace the sprocket after about two chains, or sooner if needed.
Cold-Start Chain Movement
When the saw is switched off and cold, move the chain by hand; it should travel smoothly with little effort. Pull it through several complete rotations. If the chain binds, clunks, or slips as you pull it around the bar, inspect the drive sprocket before starting the saw. Rough movement can indicate damaged teeth or wear beyond the sprocket’s service limit.
Confirm that the sprocket’s pitch and gauge match the chain; a mismatch can prevent smooth engagement. Include this check in your pre-start inspection, and repeat it when you sharpen the chain or flip the guide bar. Replace a damaged sprocket or one at its wear limit. Don’t fit a new chain to a badly worn sprocket; it can accelerate chain wear and compromise drive performance.
Ice And Packed Snow
Cold-weather debris can disrupt the smooth chain movement you checked with the saw off. Ice or packed snow can lodge around the chain and sprocket, restricting rotation or masking damage. With the saw stopped and secured, turn the chain by hand; it should move freely without binding.
Before cutting, inspect the sprocket and rotate the chain slowly. Listen and feel for clunking, binding, or slipping rather than forcing movement through resistance. Clear packed debris, then repeat the check. If derailments continue after ice or snow buildup, inspect both chain and sprocket for damage.
Replace a damaged sprocket; don’t keep running it. Maintain correct chain tension, too: if you’re unable to tension the chain properly or it repeatedly slips off, inspect the sprocket for wear.
Cold-Weather Wear Checks
In low temperatures, inspect the sprocket before starting the saw for chipped spur teeth, deep grooves, or rim wear marks at their limit. With the saw stopped, rotate the chain by hand. It should move smoothly with little effort and no binding, clunking, or slipping. Replace the sprocket when wear reaches about 0.5 mm, or sooner if cold-weather checks reveal damage or repeated chain derailments.
Cold conditions don’t change the basic replacement guideline: replace the sprocket after about two chains, or when replacing the bar if you use multiple chains in a cutting session. Check movement especially when oil thickens below freezing. Confirm that your chain, bar, and sprocket have matching pitch and gauge; mismatched parts can cause poor movement and accelerate wear.
Consistent Chain Tracking
A chainsaw sprocket should guide the chain smoothly around the bar with little effort. If you notice clunking, slipping, or uneven tracking, inspect the sprocket; wear or damage can change how the chain engages and raise derailment risk. A worn sprocket can alter effective chain pitch, causing less reliable tracking and accelerating wear on chain and bar.
On a spur sprocket, look for chipped teeth or deep grooves cut by drive links. For a rim sprocket, replace it when wear reaches the marked limit or channels look asymmetrical or warped. Check the sprocket whenever you sharpen the chain or flip the bar. Replace it at about 0.5 mm wear or after roughly two chains, whichever comes first. These checks help keep chain travel predictable.
Chain Binds During Cutting
If the chain binds during cutting, stop the saw and check whether it moves smoothly by hand with the engine off. Binding can signal sprocket damage or excessive wear, so inspect the drive teeth before returning to work. Look for chipped or uneven spur teeth, deep grooves, or rim-sprocket wear marks that have reached their limit.
Replace the sprocket when wear marks reach about 0.5 mm; continued use can accelerate wear on both the chain and guide bar. If no sprocket defect explains binding, inspect the guide-bar groove and rails for wear or damage that may obstruct the drive links. Check that the chain moves freely after correcting the cause, then make a cautious test cut and stop immediately if binding returns under load.
Mismatched Chain Pitch
Binding can also result from a chain and sprocket with mismatched pitch, which prevents the drive links from seating correctly and can cause slipping or accelerated wear. The chain, sprocket, and guide bar must be specified to work together. Check your saw’s manual or a parts lookup for the correct pitch and model-specific sprocket. Use these checks before installation:
- Confirm the chain and sprocket pitches match; don’t rely on appearance alone.
- Inspect both parts; replace a damaged or mismatched chain instead of running it against a new sprocket.
- If you switch from spur to rim, verify clutch-drum compatibility and match the replacement sprocket to the chain.
A pitch mismatch can damage the sprocket quickly, even when the new part otherwise fits.
Log Sprocket Replacement Dates
Keep a maintenance log with the sprocket’s installation date, sprocket type, and chain changes. At each chain change, record wear findings, including disappearing rim wear lines, chipped spur teeth, or wear near 0.5 mm. Note chain derailments, slipping, or binding with the date; these symptoms can justify an earlier inspection or replacement.
Use the log to plan replacement after about two chains, but replace sooner if damage or excessive wear appears. Record whether you’re using a rim or spur sprocket: you can replace a rim sprocket separately, while a spur sprocket is integrated with the clutch drum. If you’re replacing the bar during a cutting session that uses multiple chains, replace the sprocket too. Keep entries specific, so you can track service intervals.
Conclusion
Replace your chainsaw sprocket when you see hooked, chipped, or uneven teeth, or when the chain binds, tracks inconsistently, or doesn’t match the sprocket’s pitch. Inspect the rim or spur sprocket whenever you change the chain, using a bright light and a depth gauge if needed. Don’t keep cutting with a worn sprocket; it accelerates chain wear and can compromise control. Record replacement dates, and install a compatible sprocket to restore smooth, reliable operation.