How to Measure Chainsaw Bar Length: Called Length vs True Length
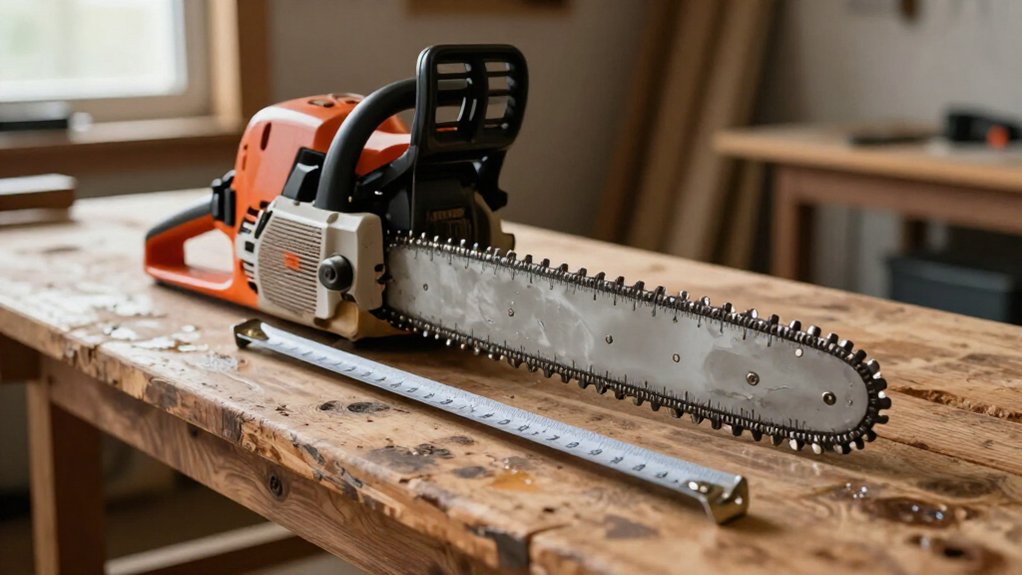
To measure called chainsaw bar length, disconnect the spark-plug boot or remove the battery, then stabilize the saw. Place an inch-marked tape at the housing edge where the bar exits, and extend it along the bar to the tip, including the sprocket. Round up to the next even inch.
Called length is usable cutting length; true length measures a detached bar end to end and is usually one to two inches longer. More guidance follows.
Called Bar Length
Called Bar Length
Called bar length is the usable cutting length, measured from where the bar exits the saw body to its tip, including the sprocket tip. You measure it with the bar attached, following its line from the saw body to the farthest point at the tip. Include the sprocket nose; don’t stop at the metal body of the bar.
Round the result up to the next even inch: a measurement of 13.5 inches is called a 14-inch bar. This rounded called length is the size you’ll usually see in replacement-bar listings. It differs from true length, which runs end to end with the bar detached. If your result falls between standard sizes, carefully check your saw’s manual or manufacturer label before choosing a replacement.
Bar Measurement Tools
Before measuring, disconnect the chainsaw’s battery or spark plug boot to prevent accidental starting. Choose an inch-marked tape measure; a ruler also works for shorter bars. You don’t need a caliper or precision ruler to find bar length, though either can measure chain dimensions. Keep the tool straight and parallel to the bar.
Start where the bar exits the saw housing, then extend the tape to the tip, including the sprocket tip. Read the measurement at the bar tip and record it in inches. Select a tool that reaches the span without bending or shifting. Verify the tape edge aligns with the bar centerline; this helps you avoid a tilted reading.
- Tape measure: inch-marked
- Ruler: shorter bars
- Caliper: chain dimensions
- Keep tape parallel to bar
Step 1: Clear Debris From Bar
With the chainsaw’s battery disconnected or spark-plug boot removed, use a clean rag to clear sawdust and debris from the bar tip.
Before measuring, remove buildup that could shift your reading. Wipe oil and debris from the housing seam as well, so you can identify the bar’s starting edge clearly. Keep the point where the bar exits the saw body visible; don’t cover it with the rag or leave residue that obscures the boundary.
When you measure, align the tape parallel to the bar. Start at the housing edge and extend the tape to the bar tip, including the sprocket tip. Don’t start at the chain nose or use the bar’s visible length alone, since the housing edge defines the measurement’s true starting point.
Step 2: Disconnect the Power Source
Disconnect the chainsaw’s power source before handling the bar or chain: remove the spark-plug boot on a gas saw or disconnect the battery on a cordless saw. Do this first. An unexpected start can move the chain across your hands and cause injury.
Keep the disconnected boot or battery away from the saw while you work, and don’t reconnect it until you’ve finished handling the bar and chain. If the chain remains installed, wear work gloves before touching it. The cutters can injure you even when the engine is off, so handle the chain carefully and keep your fingers clear of its sharp edges.
Verify the power source stays disconnected throughout the task; never rely on the trigger or switch alone to prevent starting.
Step 3: Start at Housing Edge
Place the tape measure at the front edge of the housing where the bar exits, then extend it straight and parallel to the bar to the tip, including the sprocket tip.
Before you begin, confirm you’ve disconnected the spark plug wire or removed the battery, as applicable. Start at the housing’s front edge, not at the bar mount or the point where the chain first appears. This reference keeps your reading consistent with the convention used to identify a saw bar’s called, or cutting, length.
Hold the tape firmly enough to prevent slipping, but don’t press it against moving parts or force it beneath the chain. Keep the saw stable on a level surface, with the engine off and all controls untouched. Once you have the housing-edge-to-tip measurement, round it up to the nearest even inch; that rounded figure is the called length, not a measurement of the exposed bar alone, for safe replacement planning.
Step 4: Measure to Bar Tip
Once you’ve set the tape at the housing edge, extend it straight and parallel to the bar, measuring to the bar tip and including the sprocket tip. Before measuring, disconnect the battery or spark-plug wire to prevent accidental starting. Keep the tape straight along the bar and read from the housing edge where the bar exits to the tip.
Include the sprocket nose; stopping at the bar body shortens the measurement. Round up to the nearest even inch for the called length: 13.5 inches becomes 14 inches. If the reading falls between standard sizes, check your saw’s label or manual before ordering a replacement. Keep the saw off, and keep your hands clear of the chain while positioning the tape on the stationary bar.
Step 5: Note True-Length Variance
Although called length measures from the saw housing to the bar tip, true length measures the detached bar end to end and is usually 1 to 2 inches longer. A 16-inch called length, for example, may indicate an 18-inch bar. This difference reflects two reference points, not a measurement error; don’t substitute one figure for the other when checking fit.
Clutch-cover size and shape can make bars with the same called length vary in true length. For most replacement listings, use the called length specified for your saw. For a specialty bar requiring an exact fit, provide the true length and confirm compatibility with your saw model. Before handling or removing a bar, shut off the engine, let components cool, and follow the manufacturer’s instructions.
Step 6: Clean the Tape Measure
Before measuring, wipe dirt, sawdust, and oil buildup from the tape and the housing seam so debris doesn’t obscure the reading or where the bar exits the saw. Use a clear tape marked in inches; a ruler works for a short bar. Inspect the tape hook before you place it against the bar’s starting edge. It should remain intact and sit firmly without rocking or slipping.
Hold the tape straight and parallel to the bar throughout the measurement, keeping it clear of sharp edges. Don’t force the hook or bend the tape to follow the bar; either can shift the reference point and affect your reading. If grime returns or markings look unclear, stop and clean the tape again before continuing work.
Compare Against Manufacturer Specs
Check your saw’s manual or manufacturer label for compatible bar lengths; those sizes usually indicate called cutting length, not the detached bar’s end-to-end length.
Compare your rounded cutting-length measurement with the manufacturer’s certified range. Specs may list either bar length or drive-link count; use the measure the manufacturer specifies. Confirm the replacement bar’s mount pattern matches your saw’s brand and model, even when its called length matches the specification. Never exceed the recommended maximum bar length.
An oversized bar can accelerate motor wear and increase kickback risk, so don’t treat a longer bar as a harmless upgrade. If your measurement falls between standard sizes, or the manual and label are unclear, verify the replacement with the manufacturer or a dealer before ordering.
Bar Mounting Stud Misalignment
Even a bar with the correct called length may not fit if its mounting pattern doesn’t match your saw. The studs hold the bar against the saw body, and the mounting slot must fit over both before you secure the clutch cover. With the saw disabled, remove the cover and check for debris or a bar positioned incorrectly. If the studs and slot still don’t align, don’t force the bar or tighten the cover. Verify the bar matches your saw’s make and model; called length alone doesn’t establish compatibility. Confirm the mount pattern before ordering a replacement. If the bar won’t seat, consult your manual or a dealer, and don’t operate the saw.
| Condition | Check | Action |
|---|---|---|
| Misfit | Compatibility | Verify make/model |
| Persistent | Seating | Consult manual/dealer |
Lubricate the Bar Groove
Keep the bar groove clean and lubricated so the chain can travel smoothly. Before you inspect or apply lubricant, disconnect the spark plug wire or remove the battery to prevent accidental starting. Wear work gloves whenever you handle the chain or bar, even if the chain remains mounted.
Clear sawdust and debris from the bar tip and groove. Buildup can obstruct the chain’s path, restrict movement, and interfere with lubrication. Use a suitable tool to remove packed material without damaging the groove or contacting sharp cutters.
Check your saw’s manual for the recommended lubrication method and oil. Apply lubricant as directed; don’t assume oil used on another saw is suitable. After servicing, confirm the chain moves freely along the bar before safely restoring power.
Conclusion
When you measure a chainsaw bar, distinguish its called length from its true length: the called length runs from the housing edge to the bar tip, while true length is the bar’s span. Clear debris, disconnect power, and use a clean tape measure. Compare your result with the manufacturer’s specifications, and inspect stud alignment and groove lubrication. Don’t rely on nominal size; accurate measurement helps you choose a compatible chain and operate your saw safely.