Chainsaw Maintenance Checklist: Daily, Weekly and Seasonal Tasks
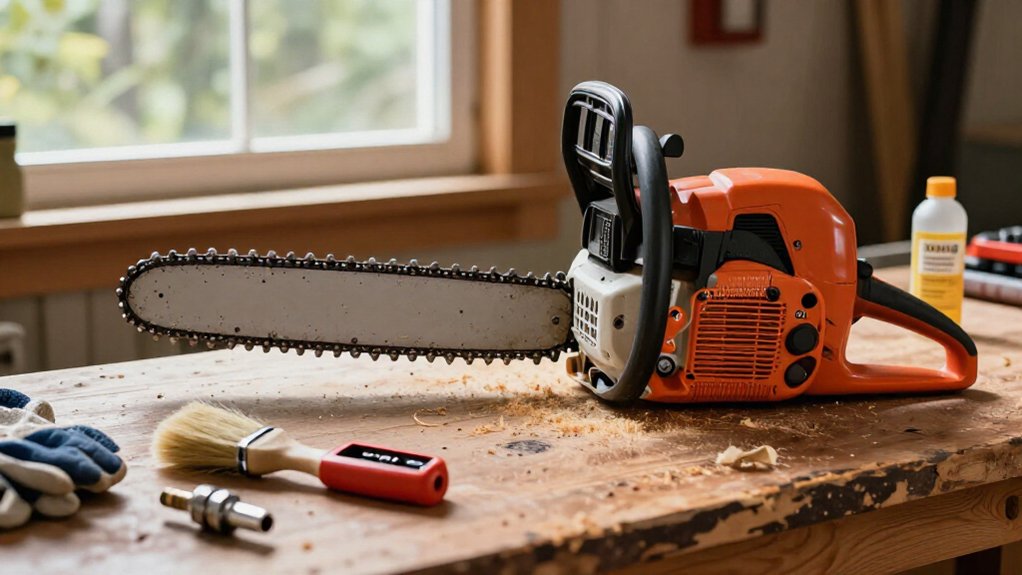
You’ll prevent failures with this daily, weekly, and seasonal chainsaw checklist. Before each use, inspect the battery or fuel system, check for leaks, and verify chain oil, brake, throttle, and stop-switch operation.
Weekly, clean the bar groove and oil passages, inspect the chain, sharpen it with matched tools, and tighten accessible fasteners to specification.
Seasonally, service the spark plug and review records. Stop for defects; the steps ahead explain checks.
Battery and Contact Checks
Before each use, inspect the battery for swelling, cracks, unusual wear, or other damage; don’t use a damaged battery.
Check the battery terminals and the saw’s contacts for dirt, corrosion, or debris that could interrupt power delivery. If you find contamination, disconnect the battery before cleaning. Gently wipe each contact point with a clean, dry cloth; don’t add moisture or apply cleaning products, which can damage electrical components. Reconnect only after contacts are clean and dry.
Before starting work, confirm the battery is fully charged. Follow the manufacturer’s charging instructions, and use only the specified charging method. Don’t begin a job with an uncertain charge level; recharge as directed. After use, store the battery in a cool, dry place when you’re not using it.
Chain Oil and Sharpening Tools
With the battery and contacts checked, inspect the chain’s lubrication system and gather the correct sharpening tools. Use manufacturer-recommended bar-and-chain oil, keep the reservoir topped up, and clear blockages from lubrication holes and oil channels. Run the saw to test the oiler, checking for oil droplets on a surface; stop if the chain and bar receive no oil.
- Keep a round file matched to your chain specification, a depth-gauge guide, and a screwdriver or scrench for adjustment.
- Secure the chain and engage the chain brake before filing. Use smooth, even strokes on every other cutting tooth, then turn the saw and sharpen the remaining teeth.
- Check the depth gauges with the guide after sharpening and file them level with it, typically every third chain sharpening.
Guide Bar Groove Inspection
Inspect the guide bar groove for packed sawdust, blocked oil passages, and uneven wear that could restrict chain lubrication. Remove the bar and chain before cleaning. Use a brush or suitable thin tool to clear debris without damaging the groove.
Check the lubrication hole; keep it open so oil reaches the chain. Examine groove walls and bar edges for burrs, uneven wear, or damage. Gently file rough edges only when appropriate.
| Step | Action |
|---|---|
| Clean | Clear debris |
| Inspect | Check hole |
| Rotate | Flip bar |
| Verify | Refill oil |
After reassembly, refill bar-and-chain oil and briefly run the saw in a safe area. Confirm oil reaches the bar and chain; stop the saw if lubrication remains inadequate before cutting, and investigate any continuing oil-flow fault.
Tighten Loose Fasteners
Check bar nuts, housing screws, handle connections, covers, and other fasteners during daily inspections and after vibration-heavy use. Retighten loose fittings with the correct tool, following the manufacturer’s instructions, and replace damaged, stripped, or missing parts rather than overtightening them. Record repairs and verify each fastener before you return the saw to service.
Inspect Fastener Tightness
Before each day’s use, make sure accessible fasteners—including bar nuts, housing screws, handle connections, and covers—are secure. During your daily inspection, look carefully first for movement, gaps, or rattling at these points and other accessible fasteners. If anything feels loose, retighten it with the specified wrench or screwdriver, following your chainsaw manufacturer’s instructions; don’t guess at the tool or tightening method.
Inspect each fastener and nearby part for cracks, damage, or worn threads before relying on it. Tightening won’t restore a damaged connection, so replace defective parts or arrange the required repair. After tightening, recheck the connection and surrounding components before starting the saw. Vibration can loosen fasteners during operation, so repeat the inspection at the next daily check. Record any loose or damaged fastener, the corrective action you took, and outstanding repairs. Don’t use the saw until safety-critical repairs are complete.
Check Nuts and Bolts
Once fastener condition is assessed, verify that bar nuts, housing screws, handle connections, and other visible nuts and bolts are secure before each use. Inspect each fastener for looseness, damage, or missing parts. Use the correct tool to tighten any loose nut or bolt, and follow the manufacturer’s specified torque when provided.
Don’t guess at torque or force a fastener; incorrect tightening can damage threads or components. After reassembly or maintenance, check the fasteners again to confirm that covers and components are secure. Never operate the saw if you find a loose or damaged fastener. Repair or replace it before use.
If a fastener repeatedly loosens, or tightening doesn’t correct a defect, record the issue in your maintenance log and arrange an inspection.
Secure the Guide Bar
With the saw switched off and cool, inspect the guide-bar nuts and nearby cover fasteners for looseness, cracks, or damaged threads. Before use, confirm the bar is seated and the fasteners are intact. Tighten loose nuts and cover fasteners with the correct wrench or scrench, following your manufacturer’s instructions and specified torque.
Don’t guess at torque or force a damaged fastener; replace worn or cracked parts before operating the saw. After tightening the bar nuts, recheck chain tension because securing the bar can change how snugly the chain sits. Verify the bar remains aligned and secure. After operation, inspect the fasteners if vibration may have loosened them. Record defects and repairs in your log, and don’t return the saw to service until corrected.
Tighten Handle Components
After securing the guide bar, inspect the handle connections and nearby housing screws for looseness, cracks, or other visible damage before each use. Check these fasteners during routine daily or weekly inspections, and again after vibration-heavy work, when engine vibration may loosen hardware. Use the correct wrench or screwdriver to tighten any loose handle fastener, following your chainsaw manufacturer’s instructions.
Apply controlled force; don’t overtighten, because excess torque can strip threads or damage handle and housing components. Replace damaged fasteners rather than relying on compromised hardware, and inspect the surrounding parts for cracks before tightening. If a handle is loose or cracked, don’t operate the saw; arrange repairs before use so you can maintain secure control during cutting without risking sudden loss of control.
Recheck After Use
At the end of each use, inspect the chainsaw for screws, nuts, bar nuts, and handle fasteners loosened by vibration. Use the correct wrench or screwdriver to tighten any loose fasteners, following the manufacturer’s instructions. Don’t guess at torque or substitute an unsuitable tool; improper tightening can damage threads or leave parts insecure.
Check that covers and guards sit securely before you store the saw. If a fastener is damaged or missing, replace it before further operation; don’t continue using the chainsaw with a compromised assembly. Record loose, damaged, and replaced fasteners in the maintenance log, noting recurring issues for follow-up.
Before your next use, recheck each fastener and confirm the saw is assembled securely. If anything won’t tighten or stay secure, consult the manufacturer’s service guidance.
Cold-Weather Starting Checks
Before starting in cold weather, check fuel and chain-oil levels, use the manufacturer-specified fluids, and inspect the spark plug. Follow the specified choke or winter-mode procedure, then let the engine warm as directed while keeping clear of the chain. Check the chain brake and other safety controls; if the saw won’t start or runs erratically, stop and inspect it for faults.
Check Fuel and Oil
In cold weather, check the fuel and oil before starting: confirm the tank holds the fresh fuel mix specified for your saw and the oil tank contains bar-and-chain oil. Follow the manufacturer’s manual for the correct mixture and cold-start procedure; don’t substitute fuels or oils. Inspect caps, seals, and nearby hoses for leaks, cracks, or damage. Don’t start the saw if you find a leak; correct the problem first.
Keep fuel and oil containers clean and tightly sealed, and use fuel within the storage period the manufacturer recommends. If the saw sputters or revs as though fuel is low, stop it and refuel before the tank runs dry. Refuel outdoors, away from ignition sources, and let a saw cool before opening its fuel tank.
Inspect the Spark Plug
If cold-weather starting is difficult, inspect the spark plug only after the engine has cooled and the saw is switched off; remove the plug cap, then use the correct socket to check the electrode for wet fuel, heavy carbon deposits, corrosion, or damage. Clean a serviceable plug, and set its electrode gap to the chainsaw manufacturer’s specification. Replace a cracked or badly worn plug.
Check that the plug cap fits firmly and the lead is undamaged. Reinstall the plug securely without overtightening. In cold weather, follow the manufacturer’s starting procedure; avoid repeated choke-start attempts, which can flood the engine and wet the plug. If inspection reveals persistent fouling after correct starting, consult the manual for the specified plug type and service interval for your saw.
Warm the Engine Properly
For cold-weather starting, check the fuel and bar-and-chain oil levels, then confirm the chain’s tension and lubrication. Follow the manufacturer’s cold-start procedure and use only the specified choke and primer settings. Keep the chain brake engaged throughout starting.
Start the saw on stable ground with the bar clear of people and objects; never drop-start it. Let the engine warm at idle only as the manufacturer directs. Then verify that it idles steadily and the chain doesn’t move. Before cutting, test throttle response, stop switch, chain brake, and oiler. Stop the saw and investigate if it runs erratically or leaks fuel. Keep bystanders clear, wear required protective equipment, and maintain secure footing during every check; don’t rev the engine to speed warm-up or bypass safeguards.
Clean, Even-Cut Wood Chips
Check the wood chips from a controlled test cut: a sharp, well-maintained chain produces clean, consistent chips, not fine dust. Before you begin, secure the saw and wear required protective equipment; make the test cut in sound wood, using a stable stance.
If the chain leaves fine dust or you must push harder, stop cutting. Switch off the engine and inspect chain sharpness; sharpen or replace the chain before continuing. Confirm chain tension meets the manufacturer’s specification, and clear the bar’s lubrication hole.
Remove debris from the bar groove, then check for burrs or uneven wear that could cause rough cuts. After maintenance, repeat a controlled test cut. Resume the job only when the saw cuts smoothly and produces consistent chips without extra force.
Fuel Leaks Near Tank
Inspect the fuel tank, cap, hose, and nearby fittings before each use for wetness, cracks, or a strong fuel smell.
If you find fuel near the tank, stop the engine and switch it off. Keep the saw out of service until you fix the leak. Keep it away from flames, sparks, and other ignition sources while checking or addressing the leak. Don’t restart or operate it before repair.
Inspect the fuel hose for cracks or damage; replace a damaged hose rather than continuing to use the saw. Record the leak and repair in your maintenance log. Confirm the area stays dry before returning the saw to service. Recheck the tank, cap, and fittings after repair for wetness or fuel odor. Do not resume use until cleared.
Prevent Running the Fuel Tank Dry
Stop cutting and refuel when the saw sputters or its engine revs indicate the tank is nearly empty; don’t let a petrol chainsaw run dry, as inadequate lubrication and cooling can cause premature wear.
Use this routine to protect the engine and maintain a reliable fuel supply:
- Keep the correct fuel mixture on hand, prepared to the manufacturer’s specification; don’t substitute or guess ratios.
- When power or engine speed signals low fuel, stop cutting, switch off the engine, and refuel before restarting.
- Follow the saw’s safety instructions during refueling, and track fuel use so you can plan supplies and notice recurring fuel-related problems.
Refuel outdoors, away from ignition sources, and check the cap is secure before restarting; clean up spills promptly.
Record Inspection Dates
Record each daily pre-start inspection, weekly mechanical check, and seasonal service with its date and the saw’s serial number. Include findings and defects, then sign and date each entry. Identify the saw by serial number in every record; don’t rely on location alone.
For each defect, log the corrective action, responsible person, and completion date. Keep the saw out of service until you verify the defect’s resolved and it’s safe to use. Attach photos or service notes to document defects and repairs.
Store entries in one consistent paper file or digital system, organized by saw and date. Review records before work to spot overdue service, recurring faults, or unresolved items. Make records legible and accessible to authorized operators and maintainers. Use the log to verify required checks.
Conclusion
Keep this checklist tied to your work schedule: inspect batteries and contacts, check chain oil and sharpening tools, clear the bar groove, and tighten fasteners before each use. In cold weather, verify starting conditions; watch chip shape for even cutting and inspect for fuel leaks. Don’t run the tank dry. Record every inspection date and correct defects before operation. If a safety issue remains, stop and service the saw before you resume cutting safely.