How to Fell a Leaning Tree Safely Without Barber Chair Splits
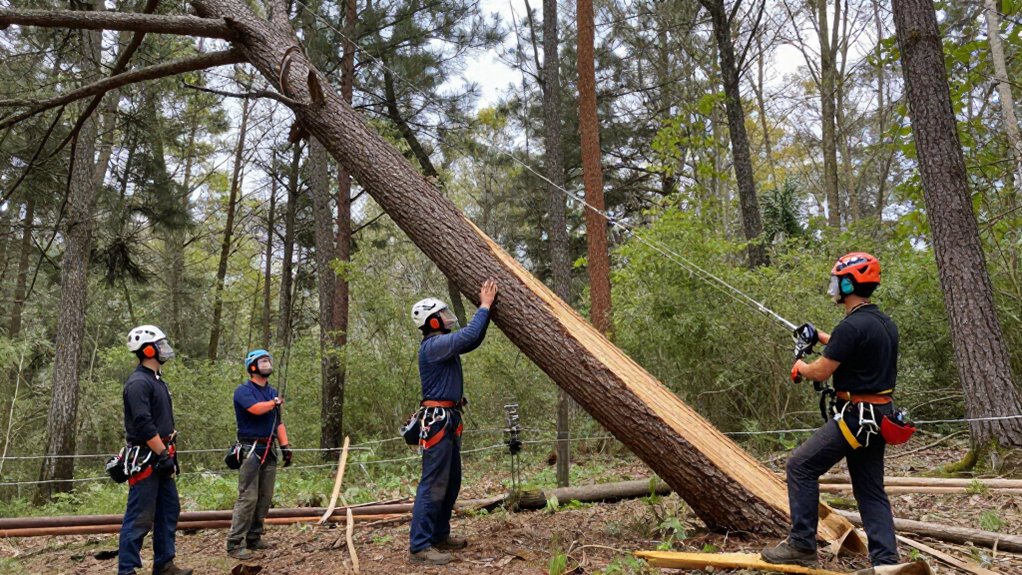
You can’t eliminate barber-chair risk when felling a leaning tree. Assess its lean, crown, wind, trunk defects, and root stability; stop and hire an insured arborist if anything’s uncertain.
Clear two escape routes back and sideways, keep bystanders outside the hazard zone, and plan the fall direction before cutting.
Use wedges and a hinge only if trained; they can’t overcome a heavy lean or unstable wood. More guidance can help you recognize when to stop.
Assess Lean and Barber-Chair Risk
Before planning a cut, assess the tree’s natural lean, branch distribution, wind, and nearby obstacles. Examine the crown and trunk for imbalance, decay, dead tops, contorted growth, and nearby snags; these conditions can make the fall unpredictable. A heavy lean raises barber-chair risk: the trunk may split upward under tension, violently throwing the tree or sawyer.
Red alder deserves particular caution; heavily leaning stems may shiver during felling or land far from your intended direction. Don’t treat a bore-cut or trigger method as a way to steer the fall; it aims to reduce splitting risk and isn’t foolproof. If substantial lean or warning signs exceed your experience, stop and leave the tree to a qualified professional. Also reassess conditions if wind shifts or changes.
Escape Route and Hinge Plan
Plan at least two clear escape routes before cutting, each leading back and to the side and separated by 90° or more, so you can move if the tree twists, kicks out, or hits another tree. Clear both routes and the stump area of brush, branches, logs, and snow; never step directly behind the tree as it tips. Plan the hinge as guiding wood: leave about 1 to 2 inches horizontally and about 2 inches at the back as the trigger.
- Clear footing; debris can turn retreat into a fall.
- Keep hinge and trigger as the only connections before release.
- Check cuts for missed wood; wrong amounts risk failure.
- Don’t trust a hinge to control a leaning tree.
- Leave hung-up or hazardous trees to a suitably experienced professional.
Step 1: Inspect Trunk for Deadwood
With your escape routes and hinge plan set, inspect the trunk and crown for dead tops, dead or hanging limbs, and loose branches that could fall during cutting.
Check the base for rot, cracks, cavities, or other damage; a weakened trunk can respond unpredictably under load. Treat any dead standing tree as hazardous, especially a fire-damaged oak, which may hide internal rot or contorted growth and fail without warning. Recheck nearby trees for deadwood that the falling tree could disturb. If you find significant defects, don’t assume a felling method will control them; stop and consult an experienced, insured professional.
Step 2: Set Wedge and Saw Position
Set plastic felling wedges within reach to help prevent the bar from pinching, but don’t rely on them to redirect a heavily leaning tree.
Keep a sharp chain and position yourself to control the saw during the plunge cut. Keep the upper bar tip, the kickback zone, clear of wood and objects. Insert the bar nose with firm control; don’t let it contact the trunk unexpectedly.
For this bore-cut method, make the face cut at a steeper angle than usual, then align the plunge cut parallel to the second face cut and two inches above the face-cut bottom. Check that you’ve left one to two inches for the hinge and two inches at the back for the trigger. Treat these dimensions as estimates; tree size and conditions may require adjustment.
Step 3: Cut the Directional Notch
After evaluating the tree’s lean, wind, nearby hazards, and clear fall zone, cut the directional notch on the side where you want the tree to fall. Keep the notch shallow, about 20 to 30% of the trunk’s diameter, to avoid weakening the tree excessively. Make the first face cut level, then angle the second cut downward at least 45 degrees. Meet the cuts cleanly to remove the wedge without leaving a ragged face.
Check that the notch points into the planned fall path, and keep your footing and escape route clear. Don’t guess at notch geometry: lean, trunk shape, and site conditions affect the tree’s response. If you’re inexperienced, don’t attempt this method. For a heavily leaning or hazardous tree, hire an experienced, insured professional.
Step 4: Bore-Cut to Control Trunk
A bore cut can reduce barber-chair risk by keeping the trunk upright as you remove wood behind the hinge, but it doesn’t control the fall direction and isn’t foolproof.
After a steep face notch, bore parallel to its lower cut, about two inches above the bottom. Leave one to two inches of hinge wood and about two inches of uncut wood at the back as the trigger. Before releasing it, check through the cut and clear missed connections, leaving only the hinge and trigger attached.
Cut the trigger only when you’re ready for the tree to fall. Match dimensions to the tree and lean: too much wood may permit barber-chairing; too little can cause an unintended fall. Use a sharp chain, control bar-nose insertion, and account for kickback. Heavy leaners and this technique aren’t for beginners in practice.
Step 5: Watch for Kerf Pinching
As the tree’s weight shifts, watch the felling kerf for signs it’s closing and pinching the bar.
Keep plastic felling wedges and a hand ax within reach; use them to hold the kerf open, but don’t rely on wedges to control a heavily leaning tree.
With the bore-cut method, preserve the rear trigger until you’re ready to release it. Removing wood between the trigger and hinge can shift the load and close the kerf. Avoid heavy pulling tension before the back cut; it can change kerf pressure and raise barber-chair risk.
If the saw gets pinched, don’t force it. A spare bar may help free the saw. Leave a hung-up or unstable tree for later, or have an experienced professional handle it when necessary.
Step 6: Refuel the Chainsaw Outdoors
Before refueling, switch off the chainsaw and let its hot engine and muffler cool. Refuel outdoors, well away from flames, sparks, and other ignition sources. Keep the saw on stable ground, and use an approved fuel container.
Follow your chainsaw’s manual for the specified fuel mixture; don’t guess or substitute ratios.
Open the tank only after the engine and muffler have cooled. Pour carefully to keep fuel off the saw and your clothing. If you spill fuel, wipe it up completely before restarting. Securely tighten the fuel cap, then move the saw away from the refueling spot before you start it.
Don’t start or run the chainsaw beside the open fuel container, and keep the container closed and away from ignition sources.
Inspect the Root Plate
Once you’ve refueled safely, inspect the root plate and trunk base for rot, cracks, loose soil, or roots already lifting on one side. Look for fresh soil movement, exposed roots, ground cracks, and decay at buttress roots. Check for a shifted root plate or soil separating from the trunk; either signals instability.
Assess these signs with the tree’s lean before deciding whether your experience and equipment are adequate. A compromised base may move unpredictably during cutting. Don’t assume a sound trunk means secure roots. If you find rot, cracking, loosened soil, or uncertain stability, stop and consult an experienced, insured tree-felling professional. A hazardous base may require a higher stump rather than a low cut above the root swell for your safety and control.
Recover a Hung-Up Tree
A hung-up tree can shift or fall without warning, so don’t work beneath it, climb it, or cut its support. Keep everyone clear of the trunk and its possible fall path. Don’t stand beneath nearby branches or trees it could strike.
| Hazard | Don’t do this | Safer response |
|---|---|---|
| Tree | Climb or cut support | Stay clear |
| Pulling | Rely on ropes, wedges, or a saw | Don’t dislodge it |
| People | Enter the fall path | Keep back |
Leave the tree until you can address it with suitable equipment and a safe method. If you lack that equipment, training, or a safe work area, hire an experienced, insured professional. Don’t assume a rope, wedge, or chainsaw can free it: they can fail or trigger an unpredictable fall. Keep bystanders outside the hazard zone.
Sharpen the Chain Afterward
After felling the tree, inspect and sharpen the chain before your next cutting job; sharp cutters help you make controlled cuts.
Secure the saw, engage its chain brake, and follow the manufacturer’s procedure before handling the chain. Wear protective gloves, and work indoors when possible, where wind and debris won’t interfere. Use a round file to sharpen each cutter, maintaining the specified filing angle and consistent strokes.
Then use a flat file to adjust the rakers to the prescribed depth; incorrect settings can cause rough cutting or kickback. Check your work against the saw’s instructions rather than guessing at angles or depth. Keep files dry in a toolbox so they remain effective and ready for the next maintenance session. Finally, check the bar-oil reservoir and refill it as needed. Adequate lubrication helps protect both chain and bar throughout your next cutting job and reduce unnecessary wear.
Conclusion
Before felling a leaning tree, assess its lean, trunk, roots, and barber-chair risk; plan a clear escape route and a controlled hinge. Position wedges and saw carefully, and keep bystanders outside the danger zone. If the tree hangs up, stop and use a qualified professional. Never cut beneath it or pull it with a vehicle. Refuel outdoors, away from ignition sources. Afterward, inspect and sharpen the chain. If conditions exceed your skill or equipment, don’t fell the tree yourself.