How to Add Bluetooth to a Chainsaw Helmet for Music and Calls
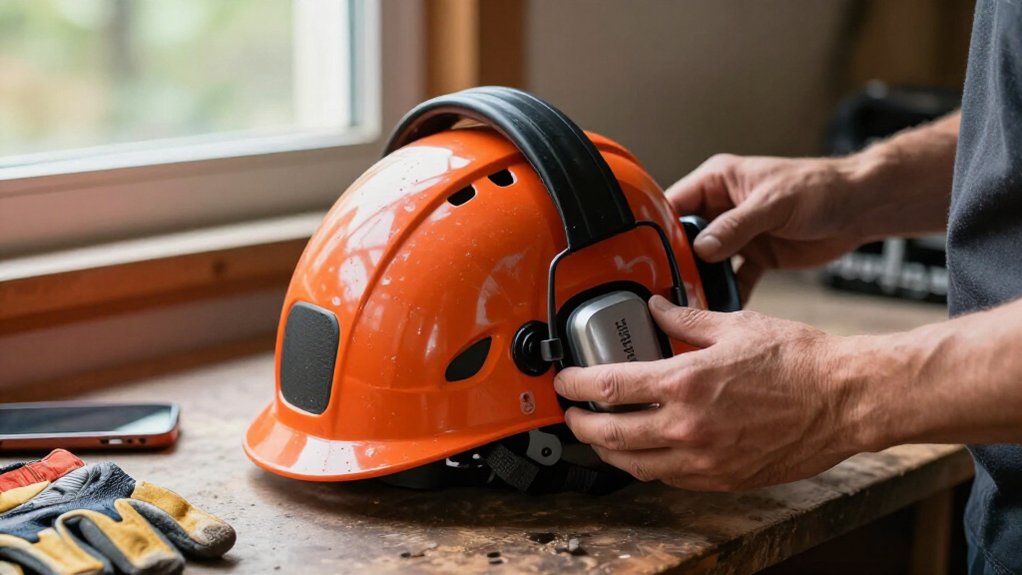
Before adding Bluetooth, confirm your helmet and hearing-protection manufacturers approve the headset and installation. Keep speakers and wires outside the ear-cushion sealing area, and never drill the shell.
With the helmet off, disconnect protection, mount the module using approved hardware, position speakers over your ear canals, and route wires flat.
Pair it with your phone, then test audio and calls while stationary. Refit cushions and verify an even seal before chainsaw use.
More safety checks follow.
Hearing Protection Compatibility
Before adding Bluetooth, confirm that the earmuffs still provide the hearing protection your work requires. Choose only a headset or speaker system approved by the helmet or hearing-protection manufacturer, and follow its instructions for combining audio with the earmuffs. Keep every speaker, wire, and adhesive pad outside the space between your ear and the cushion; anything there can create a gap and reduce noise attenuation.
After installation, check that the cushion sits evenly against your head and seals fully. Set music and call volume low enough to hear the saw, warnings, and hazards. Bluetooth audio never replaces hearing protection. If the muffs no longer seal correctly, or you can’t verify the helmet’s protection rating, remove the add-on and ask the manufacturer before using the equipment.
Chainsaw Helmet Bluetooth Compatibility
Although universal Bluetooth headsets may fit many helmet styles, a chainsaw helmet can have different space and mounting limits.
Before choosing a system, check that your helmet accommodates speakers beside your ears and provides a safe control-unit mount. Consider these compatibility points:
- Use speaker pockets or adhesive-backed pads to position speakers without pressure points.
- Route wires flat beneath the liner so they don’t snag or press.
- Mount the control unit only with methods approved by your helmet’s manufacturer.
- Confirm hardware won’t affect fit, face shield, hearing protection, or other required gear.
Never drill or cut the shell: either change can weaken its protective structure. Test the complete setup for secure fit and unobstructed shield movement before use, properly preserving all required protective equipment.
Step 1: Remove Helmet and Disconnect Hearing Protection
Set the chainsaw helmet on a stable surface before handling it, and disconnect any electronic hearing protection from its power source. Remove the helmet before you work on it; a shell keeps it from shifting or blocking your hands. If the hearing protectors use detachable headset cables, unplug them before removing the unit.
Keep power off and route cable clear of sharp edges and moisture. Release earmuffs or other components only at their designed attachment points. Don’t force clips or hinges. Place removed parts and connectors on a clean, dry surface, and check that they remain undamaged. Keep the helmet out of service until hearing protection and all protective components are properly refitted. Never operate a chainsaw with protection disconnected or components improperly fitted.
Step 2: Check Manufacturer’s Instructions
Check the helmet and Bluetooth headset manufacturers’ instructions to confirm compatible models, approved mounting locations, and attachment restrictions. Before you choose a setup, read both manuals for model-specific guidance; don’t assume every headset fits every helmet. Follow the headset maker’s directions for charging, mounting, wiring, pairing, and microphone placement, and check whether the helmet maker permits that arrangement. Use only supplied clamps, adhesive pads, or other approved hardware; never drill or cut the shell.
Also verify the headset’s waterproof rating and the helmet’s wet-weather guidance before exposure to rain or spray. Check safety guidance to verify speakers, controls, and wires won’t affect fit, hearing, visibility, or protection. If instructions conflict or leave a point unclear, contact the manufacturers before using the combination; don’t guess about safety.
Step 3: Install the Bluetooth Module
Once both manufacturers’ instructions approve the setup, fully charge the Bluetooth module and gather its mounting hardware, USB cable, a clean cloth or alcohol wipes, and a small Phillips screwdriver.
Clean and dry the helmet’s exterior. Attach the control unit, usually on the left, using its supplied clamp or adhesive pad. If you use adhesive, let it set for a few minutes before handling the unit. Never drill or cut the shell; route wires beneath the liner along existing seams, keeping them flat and clear of your ears.
Place each speaker flat in its ear pocket, centered over the ear canal. Adjust its position if sound seems weak or off-center; add thin foam spacers only if needed to ease pressure. Position the microphone near your mouth, clear of any chin-bar hinge. Secure the module and wires, then check that nothing blocks your vision or changes the helmet’s fit. Inspect attachments and wires before wearing.
Step 4: Pair Phone and Test Audio
Before testing audio, fully charge the headset, turn it on, then hold its power button until the LED flashes red and blue.
On your phone, open Bluetooth settings, scan for nearby devices, and tap the headset’s name. If it doesn’t appear, keep the phone within about three feet and scan again. If prompted for a code, try 0000 or 1234, then wait for the headset’s confirmation tone or voice prompt before proceeding.
Play music and check both speakers deliver clear, centered audio. If sound seems weak or off-center, reposition them over your ear canals. Test with helmet on and visor down. Make a call to confirm the microphone and call controls work. Do these checks while stationary, never while operating the chainsaw or starting equipment.
Step 5: Adjust Volume for Clear Calls
With pairing and audio checks complete, test call clarity with the helmet on and visor down. This setup reflects how the speakers and shell affect sound during use. Position each speaker directly over your ear; shift it if a caller sounds weak or off-center.
Set a comfortable level that keeps speech clear, but don’t turn it all the way up to overpower wind or chainsaw noise. Excessive volume can mask hazards and strain your hearing. If voices remain hard to understand, reposition the speakers or adjust the headset equalizer instead of raising volume further.
Keep calls brief while working, and pull over to a safe place before handling any call that needs concentration. Hands-free audio doesn’t remove distraction, and you must stay alert.
Step 6: Reinstall Hearing Protection Cushions
Refit each hearing-protection cushion fully and evenly in its original position so it seals around your ear. Keep the Bluetooth speakers and wires clear of the cushion’s sealing edge; anything trapped underneath can weaken hearing protection. Inspect each cushion for twists, folds, cracks, or compression before fitting it. Replace damaged cushions with manufacturer-compatible parts.
Press the cushion into its mounting channel according to the helmet or earmuff manufacturer’s instructions. Removal or replacement can affect the equipment’s rated hearing protection, so follow the specified procedure and use approved parts. After fitting, verify each cup sits securely and comfortably without pinching your ear or dislodging the speaker. Keep the headset positioned as intended before you put the helmet into service.
Check Ear-Cup Seal Integrity
After installation, inspect each ear-cup cushion and sealing surface for cracks, tears, flattening, or gaps. Don’t use damaged cups; they can compromise hearing protection. Wear the helmet and cups as intended. Check that each cup sits evenly against your head and fully covers your ear. Keep hair, helmet straps, and headset wires from beneath the cushions; obstructions can break the seal.
Turn your head and move your jaw; confirm the cushions maintain contact. Position Bluetooth speakers so they don’t lift, compress, or obstruct the cushions, then recheck the seal after installation. If a cushion’s damaged or won’t sit flush after adjustment, replace the affected parts or have the hearing protection inspected before using the chainsaw. Don’t operate until you’ve restored a reliable seal and confirmed that the cups stay correctly positioned during movement.
Resolve One-Sided Speaker Output
If the ear-cup seal remains intact but sound comes from only one side, check the headset charge and Bluetooth pairing first; low battery or a stale connection can disrupt audio.
| Check | Action |
|---|---|
| Plugs | Seat both speaker plugs fully in the headset or adapter jack. |
| Wiring | Inspect liner wires for loose, pinched, or damaged sections; reseat the speaker. |
| Position | Lay each speaker flat, centered over its ear canal. |
| Source | Test another audio source; if one side still fails, remove and re-pair the headset. |
Keep the helmet off your head while inspecting wires or reseating speakers. Afterward, test balanced audio at low volume before wearing it. If one side remains silent, don’t rely on the headset; follow its instructions or replace damaged parts before you resume chainsaw work.
Protect Battery During Storage
To prevent battery drain between uses, turn off the Bluetooth headset and disconnect it from your phone before storing it. An active link can keep the headset working when you don’t need it, so confirm the connection has ended before you put the helmet away.
Charge the headset before storage, then check its battery level before your next use; don’t assume it retained a full charge. For long periods without use, follow the manufacturer’s storage guidance. Keep the headset and USB cable together in a dry, secure place.
Before your next ride, check the charge and recharge if needed. Keep the unit away from heat, moisture, fuel vapors, and moving parts, and route cables clear of the chain and controls when you install it.
Conclusion
You can add Bluetooth to a chainsaw helmet only when the module fits your helmet and hearing protectors without compromising their seal or rating. Follow the manufacturer’s instructions, reinstall every cushion correctly, and check for even speaker output and a snug ear-cup seal. Test the setup before work, keep volume low enough to hear warnings, and never let music or calls distract you while cutting. Remove or store the module as directed, protecting its battery between uses.