How to Use a Chainsaw Log Holder for Safer, Faster Bucking
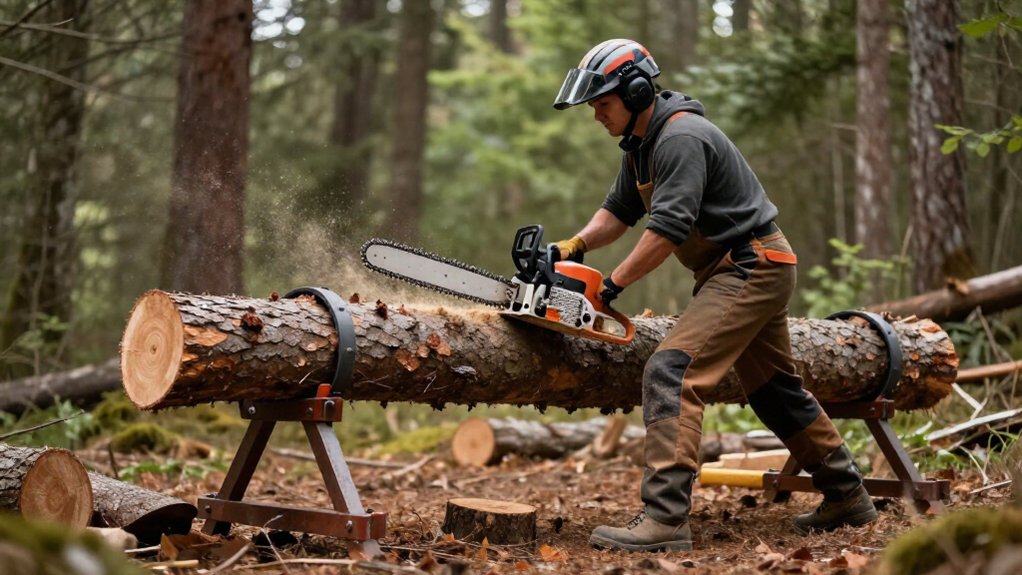
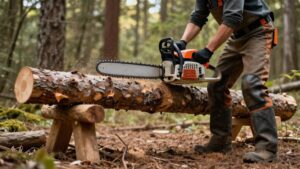
To buck safely, check the holder’s diameter and weight limits, then set it on level ground and test for rocking. Stabilize logs in the cradle, and engage the chain brake before loading.
With the saw off, check chain tension; mark your cut and align the bar through clear space, away from the holder. Inspect the cut face for cracks, debris, or tension, and stop if wet bark makes the log slip. More tips follow.
Log Diameter and Stability
Check the holder’s rated capacity before loading a log, and don’t exceed its diameter or weight limits. Center each log in the cradle, then seat it against the supports so it can’t roll or tip while you cut. For tapered or uneven logs, adjust the position until the supports contact the wood at several points and keep the section you plan to cut from shifting.
Never balance an oversized log on the holder’s frame. Instead, set it at ground level on stable, appropriate supports. After each bucking cut, recheck the remaining log’s stability; removing a section can alter its balance and support. If it moves or rocks, stop and reset the setup before cutting again. Keep your hands and body clear of unstable wood.
Check Chain Tension
Before starting the saw, switch it off, engage the chain brake, and check tension as the manufacturer directs.
On many saws, a correctly tensioned chain sits snugly beneath the guide bar, yet you can pull it around by hand while wearing protective gloves. Confirm the drive links stay in the bar groove and the chain doesn’t sag.
Recheck after fitting a chain and during work; new or warming chains can loosen. Stop the saw and let it cool before adjusting.
- Keep chain snug beneath bar; confirm links stay seated and no sag.
- Pull the chain by hand with protective gloves; follow your saw’s instructions.
- Recheck after fitting and as the chain warms during work.
- After adjustment, tighten bar nuts securely; release brake and verify free movement.
Step 1: Level the Holder Base
With the saw off and secured, set the holder on firm, clear ground, then adjust its feet until the base sits level and doesn’t rock when you press each corner.
Clear away loose branches, stones, and debris that could shift the feet before you position the frame. On uneven ground, place solid, load-bearing shims beneath low feet; avoid loose scraps that may slide or crush under the log’s weight. Press each corner again to confirm the holder’s stable and level.
After loading a log, check the base once more; an uneven load can tip or shift the frame during bucking. If the holder moves while you’re cutting, stop and recheck its footing. Reposition it on stable ground and restore a level base before you continue. Keep shims seated fully beneath supports, and don’t stack unstable pieces or use material that compresses easily. A steady base helps keep the log supported as you cut.
Step 2: Engage the Chain Brake Before Loading
To prevent accidental chain movement, engage the chain brake before lifting or placing the saw on the holder. Keep the engine off while you load whenever possible; the brake doesn’t replace shutting down the saw. The engine reduces risk if you bump the throttle or lose control during handling.
If the saw is running, engage the brake before setting it down. Keep the bar and chain clear of both the holder and the log as you position the saw. Confirm the brake is fully engaged by following your saw manufacturer’s instructions. Never touch the chain to check it.
Release the brake only after you’re in your cutting position, holding the saw securely with both hands and ready to buck. Keep it engaged until then.
Step 3: Align Bar With Marked Cut
Mark each bucking point to your intended firewood length, then stand in a stable position and line up the bar with the mark without letting the chain touch the holder. Sight along the bar and check that it sits square to the log; this helps you make even-length sections. Before you start, trace the cutting path and confirm it clears the holder’s frame, supports, and all hardware. Keep the chain away from every part of the holder as you position the saw.
If the log shifts, stop and recheck the mark and bar alignment. Secure the log again before cutting. Don’t begin until the bar points through clear space and the marked line remains visible. Make these checks from your stable stance, without rushing.
Step 4: Let Saw Weight Feed
Once the bar is aligned and the cutting path is clear, hold the saw firmly with both hands and let its weight and steady throttle feed the chain through the wood. Don’t push or lean on it.
Keep the log seated securely in the holder so it can’t roll or shift as you cut. Keep your grip light but controlled, and stand securely before starting each cut. A sharp bar and chain cut efficiently; if the chain slows, ease off rather than adding pressure, which can reduce control and raise kickback risk.
Keep the bar clear of the holder’s frame throughout the cut. If the holder moves, stop cutting and reassess its setup. Stop the chain before repositioning the log, then check the next cut path.
Step 5: Prevent Guide-Bar Pinching
Before cutting, check how the log rests in the holder and where its weight may shift, since compression can close the kerf and pinch the guide bar. Position the holder so the cut closes onto the support rather than trapping the bar, and follow its instructions for cut direction. Top compression usually closes cuts made from below; compression underneath usually closes cuts made from above. Keep the bar clear of metal parts.
Make a shallow test cut from the compressed side, then finish from the opposite side if needed. Leave a small uncut wood strap until the log is stable and the kerf stays open before completing the final cut. If the kerf closes or the bar binds, stop the saw, engage the chain brake, and free the bar only after securing the log. Never twist or force a running saw.
Step 6: Latch Holder Before Moving
Secure the log and fully engage the holder’s latch before lifting, rolling, or repositioning it. Set the log firmly in the holder, then check that the latch hook or pin sits in its catch. Confirm it can’t slip free under the log’s weight; don’t rely on partial engagement.
Keep your hands clear of pinch points between the latch, holder, and log as you secure it. Before moving, make sure the holder stands stable on level ground and the latch remains closed. Then lift, roll, or reposition the log.
If the latch won’t engage securely, don’t move the holder. Unload it, correct the log’s position, and try again. Stop if the holder shifts or the latch opens, and resecure the setup before continuing.
Inspect the Cut Face
Inspect the exposed end grain before each cut for cracks, knots, and splits that could show where the wood may separate or pinch the bar. Look for tension signs such as a bowed log, compressed fibers, or a widening crack; these clues can show which side is under compression and which is under tension. Check that the cut face sits square to the log and remains stable on the holder; a tilted or shifting piece can twist during bucking.
Note grain direction and inspect for visible dirt, stones, or metal embedded in the face. Keep the chain clear of contaminants, which can damage it or cause kickback. After each cut, reinspect the face because releasing internal tension can change how the remaining log is supported. If you spot debris, don’t cut through it; remove it safely with the saw shut off before resuming work.
Holder Slips on Wet Bark
Even after checking the cut face, wet bark can let a log roll or slide on its holder. Wipe mud, moss, and loose bark from contact points, then seat the log so the holder’s teeth or supports bite into sound wood. Set the holder on firm, level ground; its stable base helps prevent sliding when your saw touches the log. Before cutting, test that the piece sits firmly and cannot roll.
| Check | Action |
|---|---|
| Contact points | Clear debris; seat on sound wood. |
| Movement | Stop saw; clamp or reposition. |
Never try to restrain a moving log by hand while cutting. Recheck stability after every cut; shorter sections may shift more easily than the original length. If slipping continues, stop the saw before you resume cutting.
Oil Pivot Joints Monthly
Oil the log holder’s pivot joints about once a month with regular use, or sooner if they become stiff or noisy.
Before lubricating, brush away dirt and sawdust so debris won’t mix with the oil and increase wear. Apply a few drops of light machine oil to each moving joint. Then move the holder through its full range to spread the oil. Wipe off excess oil; it can collect debris or drip onto logs and your work area.
Keep the holder stable and your hands clear of pinch points while you move its parts. Don’t lubricate near a running chainsaw or where oil could reach the chain or cutting area. Follow the manufacturer’s lubrication instructions, especially if they specify a particular lubricant or service interval.
Conclusion
Use a holder rated for your log’s diameter, and make sure the base sits level before loading. Check chain tension, engage the brake while positioning the log, and latch the holder before moving it. Align each cut with your mark, then inspect the cut face before continuing.
If wet bark makes the holder slip, stop and reset it. Lubricate pivot joints monthly. These checks help you buck logs more steadily and reduce avoidable risks.