How Tight Should a Chainsaw Chain Be? The Snap Test Explained
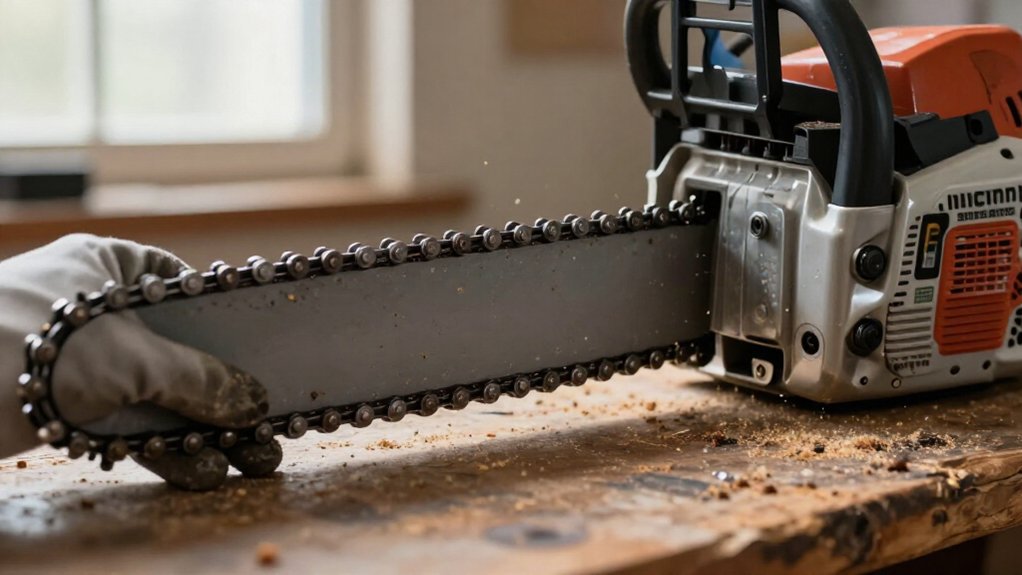
With the saw switched off and the chain cool, wear gloves and pull the chain down at the guide bar’s midpoint. It should snap back snugly against the bar rails; drive-link tips must stay in the groove, and the chain should move smoothly by hand.
If it sags, binds, or won’t return, adjust it according to your manual. Check after refueling once cool, and stop before any adjustment. Learn what else affects tension and fit.
Cold-Chain Snap-Test Baseline
A cold chain gives you the safest, most reliable tension check. Turn off your chainsaw and let the chain cool completely before you inspect or adjust it; heat can change its fit as it cools. Put on a heavy-duty glove, then pull the chain straight down at the guide bar’s bottom centre. The drive-link tips should remain inside the bar groove. Release it: the chain should snap back against the bar rails, with the drive links seated and the chain snug beneath the bar.
If the chain sags or its drive links come fully out of the groove, it’s too loose. If it’s difficult to move by hand, it may be too tight. Adjust the tension, then pull the chain along the bar by hand. Check that it moves freely while staying snug.
Why a Loose Chain Derails
When slack develops, the chain’s drive links can lift out of the guide-bar groove and jump off during cutting. A sagging chain may catch as it moves around the bar, damaging drive links and creating a dangerous whipping hazard for you. Stop cutting if you see slack; don’t keep operating the saw.
With the saw off and gloves on, pull the chain down at the bar’s midpoint. If the drive links come completely out of the groove, the chain’s too loose. A tensioned chain stays seated and snaps back against the bar rails when you release it. Sagging or a weak return signals excess slack, so adjust tension according to your saw’s instructions. Never inspect or adjust a chain while the saw runs.
Australian Hardwood Heat Expansion
Cutting dense Australian hardwoods such as ironbark, Yellow Box, and seasoned River Red Gum generates heat that expands the steel chain and can loosen it. Check chain tension more often throughout each workday while cutting these woods; heat and violent vibration can stretch the chain faster than softer European pine. Never check or adjust a running chain. If heat leaves it loose, stop the saw and make only the adjustment needed to continue safely.
After cutting, loosen the chain while it’s warm, allowing it to contract as it cools. Leaving it tight can create excessive tension, damaging bearings or snapping the chain. Once the saw and chain have cooled completely, recheck tension and set it according to the manufacturer’s instructions before your next use.
Drive-Link and Bar-Groove Fit
Check that every drive link sits fully in the bar groove. Pull the chain down at the bar’s midpoint; the links may lift slightly, but they must stay captured by the rails. Release it, then confirm it snaps against the bottom rail and moves smoothly by hand without a hanging gap.
Drive-Link Seating
Proper drive-link seating keeps the chain engaged with the guide bar. During a tension check, each drive link should remain fully inside the groove; none should pull completely clear. Midway along the bar, pull the chain down. Its drive-link tips should stay seated, and the chain should snap back against the rails when you release it.
A seated chain rests snugly beneath the bar, while its tie-straps lightly touch the rails.
Before checking movement, switch off the saw and let the chain cool. Then pull it along the bar by hand; it should move smoothly without lifting drive links from their groove. If links come completely out or the chain sags below the bar, stop. Adjust tension before cutting, and repeat the check.
Bar-Groove Fit
With the saw switched off, use a gloved hand to pull the chain down at the bar’s lower centre. Check the drive-link tips as you pull. Each drive link should remain fully seated in the guide-bar groove; its tip must not come completely out.
If any drive links lift clear of the groove, your chain is too loose. Adjust tension according to your saw’s instructions before cutting, then repeat this check. Release the chain and confirm it snaps back against the bar rails.
The tie-straps should lightly contact the bar. This fit keeps the drive links engaged in the groove while you assess tension. Don’t perform the check with the engine running or with bare hands. Keep your fingers clear of the chain teeth.
Smooth Chain Movement
After confirming the drive links stay seated when pulled down, pull the chain along the top of the bar toward the nose. With the engine off and the chain brake released, use a gloved hand to move it; keep your fingers clear of the cutters. It should travel smoothly without binding while its drive links remain seated in the bar groove.
At the bar’s midpoint, pull the chain down, then release it: the links should stay in the groove and the chain should snap back against the rails. If it sags below the bar or its drive links lift out of the groove, it’s too loose. If it resists movement or won’t snap back freely, it may be too tight. Correct the tension before starting the saw.
Bar Length and Pitch
Choose a bar length suited to your saw and cutting needs; length alone doesn’t determine chain pitch. Match the chain’s pitch to the sprocket, and verify its pitch, gauge, and drive-link count against the bar stamp or manual. Don’t force an incompatible chain—confirm it seats in the groove and moves smoothly when tensioned.
Match Pitch to Sprocket
Match the chain’s pitch—the distance between its drive links—to the drive sprocket’s pitch; common sizes include ¼ inch, .325 inch, ⅜ inch, and .404 inch. Your bar length doesn’t determine the pitch you need. Check your saw’s manual, then confirm the sprocket and guide-bar markings before buying a replacement.
The chain must also match the bar’s gauge and drive-link count; pitch alone won’t guarantee a correct fit. If the chain and sprocket pitches differ, the drive links may not engage smoothly. That mismatch can cause rapid wear and create unsafe operation, even if the chain appears to fit.
Verify all three specifications—pitch, gauge, and drive-link count—against both saw and bar requirements. Don’t select a chain by bar length alone, and don’t run a chain that binds, skips, or seats poorly. Correct matching supports dependable engagement; it doesn’t replace proper tension checks before you start work before every cut.
Choose the Right Bar Length
Once pitch, gauge, and drive-link count are confirmed, select a guide bar within your chainsaw’s approved length range that suits the wood you typically cut.
Use the manual or bar stamp to confirm permitted lengths and the saw’s specified pitch; don’t choose by reach alone.
| Cutting task | Practical bar choice | Control reminder |
|---|---|---|
| Small limbs | Shorter approved bar | Easier handling |
| Firewood logs | Length suited to log size | Keep footing secure |
| Large timber | Longer, only if approved | More power, harder control |
A longer bar can reach wood, but it demands more power and can be harder to control. Choose the shortest approved length that handles your usual cuts. Verify its pitch matches the drive sprocket and bar; never run an unapproved length.
Check Chain Compatibility
To fit the right chain, check the guide-bar stamp or your saw’s manual for the required pitch, gauge, and drive-link count. Match the chain’s pitch—the spacing between its drive links and cutter teeth—to the pitch specified for both the bar and drive sprocket. Then match its drive-link count to the exact bar model; bar length alone won’t identify the correct chain.
Before installing a replacement, confirm that pitch, gauge, and drive-link count all match your bar and saw. Never force a chain that won’t fit. If the stamp is unreadable, use your chainsaw’s make and model to verify the specifications with the manufacturer or a parts guide. Check compatibility before proper tensioning: the snap test can’t make an incorrect chain safe or suitable.
Checking Slack After Refueling
After refueling, switch off the chainsaw and let the chain cool before checking its slack; never check or adjust a running saw. With heavy-duty gloves on, pull the chain down at the guide bar’s midpoint. The drive-link tips should remain inside the groove. Release it: the chain should snap back against the bar rails. Sagging or links pulled fully out signal excessive slack.
| Check | What you see |
|---|---|
| Correct | A reassuring snap-back |
| Too loose | Sagging; danger of derailment |
If you need adjustment, follow your saw’s manual, then pull the chain along the bar to confirm it moves freely and sits snugly. Recheck routinely during work, especially in the first half-hour or when cutting hardwood. If it loosens, stop and let the saw cool before readjusting.
Engine-Off Adjustment Safety
Before adjusting chain tension, switch off the engine and let the chain cool completely. Wait until the chain is cool to prevent burns.
Put on heavy-duty work gloves whenever you touch or inspect the chain. Keep the engine off during checks; never test or adjust tension with the saw running.
With the saw off, perform the snap test at the bar’s midpoint. Pull the chain down, then release it and check that it returns against the guide-bar rails. Keep your gloved hands clear of sharp cutters, and don’t force the chain.
If you make an adjustment, follow your saw’s instructions, then firmly tighten both bar nuts before restarting. Recheck that the chain sits correctly against the rails, and only then prepare to start the saw safely.
Avoiding Excessive Tension
A properly tensioned chain sits snugly against the bar, with its drive links seated in the groove, but still moves smoothly by hand. Set tension only when your saw’s off and chain is cool; a hot chain expands, so tightening it then can leave it dangerously tight as it cools. After adjusting, pull the chain along the bar by hand. If it binds or resists movement, loosen it slightly.
- Excessive tension adds friction, wears the bar rails, chain, sprocket, and engine bearings, and reduces cutting efficiency.
- Secure the bar nuts, then recheck the chain’s movement.
- Loosen tension after work so the chain can contract safely as it cools.
Aim for hand movement, not force; proper tension protects components and helps the saw cut efficiently.
Inspect Cutters for Uneven Wear
Uneven cutters can make the saw pull to one side, vibrate, or produce crooked cuts. Before you inspect the chain, switch off the saw and put on gloves; cutters remain sharp even when the engine’s stopped. Check teeth on both sides, comparing their lengths and sharpening angles.
Look for cutters that are visibly shorter, blunter, chipped, or damaged. Left- and right-hand cutters should be sharpened evenly, so don’t judge one side alone. Unequal cutting edges can create vibration and uneven cutting, even when chain tension is correct.
If you find several badly worn or damaged cutters, don’t compensate by over-sharpening the longer teeth. That can worsen imbalance and remove unnecessary material. Have a professional sharpen the chain, or replace it if damage is extensive.
Conclusion
Set chain tension with the engine off: it should sit snugly in the bar groove, pull freely, and snap back against the bar. If it sags or derails, tighten it; if it binds, loosen it. Match the chain’s pitch and drive links to your bar. Recheck after refueling, especially in heat, as hardwood cutting can warm the chain. Don’t overtighten—it accelerates wear. Inspect cutters for uneven wear, and follow your saw’s manual.