How Often to Flip a Chainsaw Bar for Even Wear and Longer Life
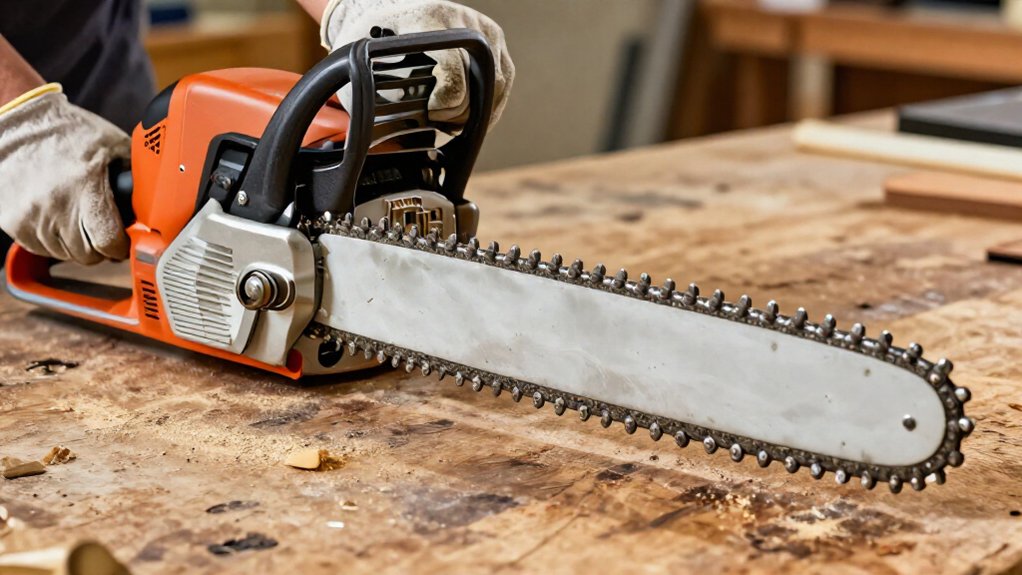
Flip your reversible chainsaw bar whenever you sharpen the chain, or every 20 to 25 hours, to spread wear across both rails. After heavy cutting or abrasive work, flip it sooner.
Confirm your saw accepts a reversible bar, and follow its manual for removal and reinstallation. Clean the groove and oil hole, then check oil flow, alignment, and chain tension before cutting. Don’t flip a cracked or worn bar; the next checks help you spot problems.
Uneven Rail Wear Explained
As the chain runs, friction wears the guide-bar rails, and the lower rail often wears faster if you keep the bar in the same orientation. Uneven rails can make your chain track poorly, producing crooked cuts, forcing extra tension adjustments, or causing binding. Before use, inspect both rails for unequal wear.
Wiggle the chain in its groove; excessive movement can signal that the bar has worn. A symmetrical bar can share wear evenly when you flip it 180 degrees. Make this part of your routine at each sharpening, or after about 20 to 25 hours of use. Don’t rely on flipping to fix damage: deep grooves, cracks, a bent bar, or wear on both sides call for replacement. Stop work and replace it before cutting.
Confirm Bar Compatibility
Before flipping the bar, check that it’s designed to be reversible; most bars have symmetrical rails, but the saw manual or bar markings should confirm that the mount, length, and oil holes match your chainsaw.
Also verify that lubrication holes and chain-tensioning features will align after rotation; a poor fit can interrupt oil delivery or prevent proper tensioning.
- Match the bar mount and length to your saw’s specifications.
- Confirm oil holes and tensioning points line up in the reversed position.
- Don’t reverse directional bars or damaged bars; replace them instead.
Mini chainsaw bars may also be reversible, but follow their manufacturer’s instructions. If markings are unclear, consult the manual or a service professional before reinstalling the bar. Never force a mismatched part into place.
Turn After Each Use
After each use, turn the guide bar over to help spread chain-friction wear across both rails.
Before flipping, switch off and cool a gas saw, or disconnect an electric saw or remove its battery. Remove the chain and bar, then rotate the bar 180°.
| Task | Check |
|---|---|
| Isolate power | Saw is safe |
| Remove parts | Chain and bar off |
| Turn bar | Rotate 180° |
| Refit safely | Check alignment |
Reinstall the bar and chain, then verify alignment and chain tension before you restart the saw. While cleaning, inspect the rails and nose for deep grooves, cracks, bending, or excessive wear. Flipping can’t repair damage; replace a compromised bar before cutting.
Make this quick check part of your routine, but follow your saw manual if it gives a different procedure for your specific model.
Clean the Bar Groove
With the saw switched off and safe to handle, remove the bar and chain, then clear sawdust and oil buildup from the groove with a suitable tool. Clean the oil hole and check the groove for wear; if the chain wobbles noticeably, replace the bar. Reassemble the saw, then check chain alignment and tension before use.
Remove Sawdust Debris
Once you’ve removed the chain, clear sawdust and debris from the bar groove along its full length with a screwdriver or suitable groove-cleaning tool. Keep the saw switched off and let it cool before you work; wear gloves to protect your hands from sharp chain teeth.
Packed debris can restrict chain movement and contribute to poor lubrication, so don’t clean only the visible sections. Clear the chain-oil hole too, since sawdust there can block oil flow to the bar and chain.
Remove buildup whenever you flip the bar or sharpen the chain. Before reassembly, check that the groove and oil hole are clear. Refit the bar and chain, then check chain tension before you start cutting. Follow your saw’s manual for handling and assembly.
Brush the Groove
With the chain removed and the saw switched off, brush or scrape sawdust, sap, and debris from the full length of the bar groove so the chain can move freely.
Work carefully along both rails, keeping your tool from nicking or bending them; damaged rails can affect chain tracking. Remove material from the groove’s entire length, not just dirty sections. Also clear the chain-oil hole so oil can reach the groove. Don’t force a sharp tool into the passage or gouge the bar.
Clean the groove whenever you flip the bar or sharpen the chain, and after cutting in especially dirty conditions. Before reinstalling the chain, confirm the groove and oil hole are clear. Then fit the chain and check its tension before operating the saw.
Clear Oil Buildup
Clear oil buildup from the bar groove with the saw powered off and cooled down. Before you begin, disconnect the power source or remove the spark-plug lead, as applicable. Take off the guide bar and chain; don’t clean around moving or hot parts.
Use a screwdriver or a suitable groove-cleaning tool to lift out sawdust, dirt, and residue. Clear the chain-oil hole, too, so lubricant can flow freely into the groove. Clean whenever you see buildup, including during bar-flipping or chain-sharpening maintenance. Once the groove and oil passage are clear, reinstall the bar and chain.
Before restarting, check that the chain aligns and has tension. Keep your hands clear of the cutting edges and follow your saw manufacturer’s instructions for safe removal and installation.
Check Groove Depth
After cleaning the bar groove, switch off the saw, disconnect its power source or remove the spark-plug lead, and take off the chain.
Inspect the groove and rails. Clear sawdust or debris so you can judge the channel. Seat the chain in the groove and wiggle it side to side. Slight movement is normal, but excessive play suggests a widened groove; the bar may need replacing.
Check whether the chain sits unusually deep, which can mean the rails have worn down and no longer support it. Don’t flip a bar with damaged or worn rails; replace it. If the groove and rails are serviceable, flipping the bar can spread wear. Inspect whenever you sharpen the chain or flip the bar, and clean the groove regularly.
Clean Before Reassembly
Before you reassemble the saw, scrape sawdust and debris from the bar groove with a screwdriver or suitable groove-cleaning tool, taking care not to damage the rails. Work with the engine off and the spark-plug lead disconnected, and wear gloves to protect your hands from the chain. Run the tool along the groove’s full length, including the nose, where packed dirt can restrict chain travel.
Clear the chain-oil hole too; a blockage can keep oil from reaching the bar and chain, increasing friction and wear. Don’t force the scraper against the rails; remove residue without gouging or bending them. Reinstall the cleaned bar and chain, then verify that the chain sits correctly and has proper tension before starting the saw, as your saw manual specifies.
Account for Seasonal Storage
Before seasonal storage, remove the bar and chain, clean away sawdust, sap, and resin, and dry both parts. Loosen the chain tension and store the equipment dry to help prevent corrosion. If your bar’s reversible, flip it after inspecting both rails; replace it if you find cracks, bending, or deep wear.
Clean Before Storage
If you’re storing your saw for the season, remove the bar and chain, then clear sawdust, sap, and resin from the bar groove and oil hole. Clean debris from the sprocket nose, and check that the oil passage is open; blocked passages can impair lubrication when you return to work. Use a suitable brush or cloth, and avoid damaging the bar’s surfaces while removing residue.
Inspect both rails as you clean. If you find burrs, uneven wear, or damage, correct the problem before storage or replace the bar if needed. Wipe the guide bar dry, then keep it in a dry, protected place to limit moisture-related corrosion. When you reinstall the bar and chain, check their alignment and verify chain tension before starting the saw.
Loosen Chain Tension
Once the saw is switched off and cool, loosen the chain tension for seasonal storage so it isn’t left tight around the bar for months. Follow your manufacturer’s storage guidance, loosening the chain without leaving it slack enough to come off the bar. With the saw powered off, follow the manual’s adjustment procedure.
After adjustment, reinstall the clutch cover securely and confirm the chain brake and other safety features work as specified. Check tension before your next use because storage and temperature changes can affect fit. With the saw safely powered off, confirm the chain sits correctly in the bar groove and moves freely by hand before restarting. If it binds or hangs loose, adjust it by the manual before starting; don’t assume the stored setting remains safe. Keep hands clear of cutters.
Protect Against Moisture
To limit corrosion during seasonal storage, switch off the saw and clean sap, sawdust, and resin from the guide-bar groove and oil hole. Trapped debris can hold moisture against the metal and encourage rust. Wear gloves while handling the chain.
Dry the bar thoroughly before storing the saw in a dry, protected place. Check that both the bar and chain are clean and properly oiled so their metal surfaces have a protective film. Don’t store a damp saw in a shed or vehicle where condensation can collect. When you prepare the saw for use again, inspect the bar for rust, cracks, or other damage before restarting. If you find a crack or significant damage, don’t use the saw; replace or service the bar first.
Oil Distribution Check
Before flipping the bar, clean its oil hole and groove so debris won’t block lubrication.
With the saw switched off and cool, check that the oiler sends bar-and-chain oil to the guide bar. Inadequate flow raises friction and speeds wear, so don’t assume the system works because the reservoir looks full. Use suitable bar-and-chain oil, and keep the reservoir filled. After reinstalling the bar and chain, start the saw according to the manual and confirm oil reaches the chain before cutting. Keep clear of the moving chain; follow the manufacturer’s safe testing procedure and wear required protective equipment.
Inspect and clear the oil hole after each use to maintain consistent distribution. If oil doesn’t reach the chain, stop and correct the cause before work.
Rail Cracks and Burrs
After confirming oil reaches the chain, inspect both guide-bar rails for cracks before flipping the bar.
Switch off the saw and disconnect its power source or remove the battery before you inspect or file. Examine each rail edge closely for burrs that can snag the chain or impede its travel. You can carefully dress minor nicks with a flat file, keeping the filing controlled and light.
Flipping the bar helps spread rail wear, but it won’t repair cracks or severe damage. A cracked bar needs replacement, not rotation back into service. Watch for burrs that return quickly, chain wobble in the groove, or uneven wear on both sides. These signs point to a bar that needs replacement. Check the rails during routine bar care.
Avoid Flipping a Damaged Bar
If the bar has cracks, chips near the nose, or visible bends, replace it rather than flipping it; rotation won’t repair structural damage.
Inspect the bar before use; flipping can’t correct wear or secure a loose nose wheel.
- Replace if rails are deeply grooved, uneven on both sides, or let the chain sit too deep.
- If the chain wobbles, tracks poorly, or jumps off, inspect the bar; replace it if wear’s responsible.
- A loose nose wheel means replace, not flip.
You can file minor rail nicks smooth, but replace severe damage. Don’t keep cutting if the chain won’t track correctly; install a compatible bar and follow your saw maker’s fitting and tensioning instructions before resuming work. Check chain seating and nose-wheel play during inspection for safe operation.
Record Flip Dates
Record each bar flip in your maintenance log, noting the date, hours since the last flip, and which side faced up. Link each entry to a chain sharpening; flipping the bar whenever you sharpen the chain gives you a reliable reminder. Track operating hours between flips, aiming for about 20–25 hours. Flip sooner if you’ve been cutting heavily or working in abrasive conditions, which can accelerate wear.
When you inspect the bar, note uneven rail wear, grooves, or damage. These details help you catch developing problems before they affect cutting or safe operation. Review your records to spot missed flips and monitor wear over time. If the rails are worn too severely, don’t rely on another flip to fix them; replace the bar. Keep the saw off and follow the manufacturer’s instructions while inspecting or servicing it.
Conclusion
Flip your chainsaw bar after each use if the manufacturer permits it, and confirm the bar fits your saw before turning it. Clean the groove, check oil flow, and inspect both rails for burrs, cracks, or uneven wear.
Don’t flip or reuse a damaged bar; replace it if needed. Before seasonal storage, clean and protect the bar. Record each flip so you can track wear. Always shut off the saw, let it cool, and wear gloves during maintenance.