How to Cut Firewood With a Chainsaw: Bucking Logs Fast and Safely
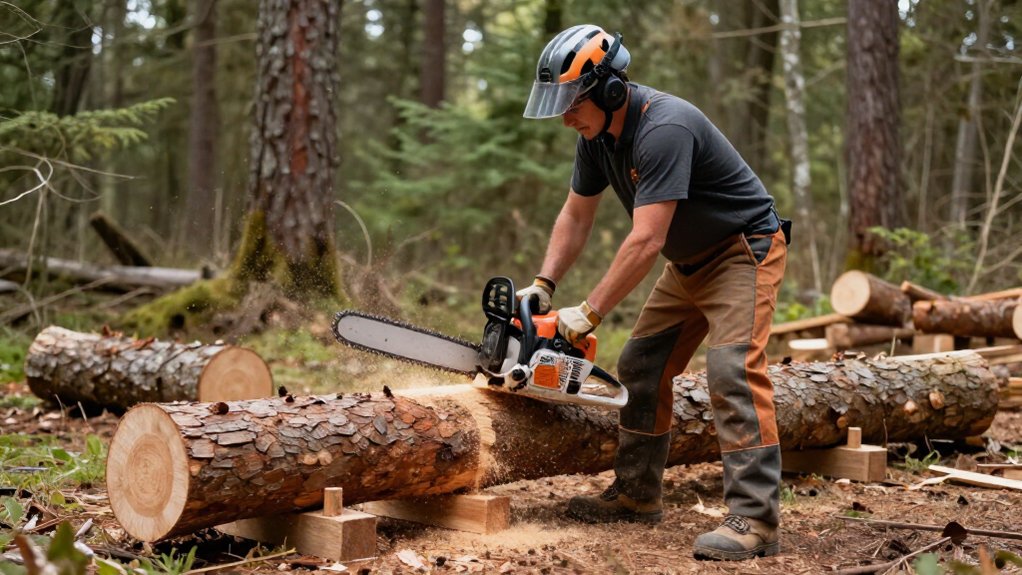
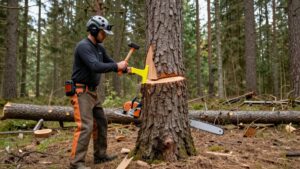
To buck firewood quickly and safely, inspect the saw and set chain tension as its manual directs. Clear brush, keep limbs supporting the log, and secure it against rolling on firm ground. Wear chainsaw trousers, gloves, boots, eye and face protection, plus hearing protection when needed.
Match each cut to the log’s support, and keep the bar clear of the ground. Move rounds safely. The steps below cover hidden metal, stalls, and essential filter care.
Log Bucking Speed and Safety
Work on firm, level ground with a stable stance and clear cutting space, and keep the guide-bar nose away from the ground.
Before cutting, inspect the saw and chain. Mark desired log lengths to make bucking efficient. Assess how each log rests before you cut. If it lies supported along its full length, cut from the top.
When both ends support it, cut about one-third through from the top, then finish from below. For a log supported at one end, start underneath and cut about one-third through. Finish from above while standing clear of the falling section. Support the log to reduce pinching. If the bar becomes trapped, switch off the saw before using a plastic or wooden wedge to free it.
Check Chain Tension First
Before each cutting session, check the chain tension according to your chainsaw manual.
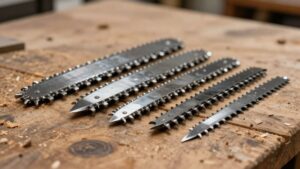
A loose chain can leave the guide bar; a tight chain can wear the chain and bar and strain the saw. With the engine off and chain brake released as your manual directs, wear gloves. Check that the chain sits in the bar groove and pulls smoothly by hand.
- Use the specified tensioning mechanism.
- Adjust tension until the chain fits correctly.
- Retighten the guide-bar nuts securely.
- Pull the chain by hand again to recheck movement.
- Recheck tension after the chain warms during use; heat can loosen it.
A chain that’s too loose may come off while cutting. Don’t skip this check before starting, and follow your saw’s manual for each adjustment.
Step 1: Clear Brush Around Logs
Clear brush and unusable small branches around the log to make room for cutting and storing timber, but leave limbs that support the tree until the main sections are cut. Remove non-supporting branches first, working from a stable position and keeping your escape path open. Check each branch for tension before cutting; a bent limb may be a springpole and snap back when released.
Don’t stand in its likely path. On hillsides, stand uphill of the log so you can move clear if it shifts. Before removing any supporting limb, assess whether the log could roll or collapse. Plan where you’ll move, and don’t cut that limb until the main sections are down. Clear debris away from your work area and timber storage spot.
Step 2: Wear Chainsaw Protective Gear
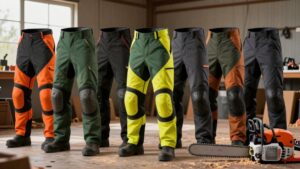
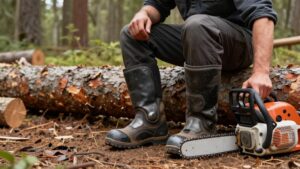
Wear chainsaw-protective trousers, gloves, and boots to help protect your legs, hands, and feet from cuts. Choose gear that won’t snag or restrict movement. Put on thick, long-sleeved clothing and protective saw gloves before starting the saw.
Add a face shield and safety glasses to guard your eyes from flying wood chips; wear both, since a shield alone may not provide adequate eye protection. Use hearing protection with a petrol chainsaw. Some cordless models may be quiet enough that you don’t need it, but protect your hearing whenever noise levels warrant it. Inspect your protective equipment for damage and replace worn items.
Step 3: Spot Compression and Tension
Once you’ve checked your protective gear and saw, assess how the log is supported to spot compression and tension.
A log supported at both ends is compressed across the top and tensioned underneath. Cut about one-third through from above, then underbuck from below to meet the cut. If one end supports the log, the top is tensioned and the underside compressed. Underbuck about one-third from below, then finish with an overbuck from above. When the log rests along its length, pinching is less likely; overbuck from the top with light pressure.
If compression closes the kerf and traps the guide bar, switch off the saw before freeing it. Use a plastic or wooden wedge, or raise the section from below. For a tensioned limb, make a relief cut away from the trunk before the final cut. Stay clear: released wood can spring or shift.
Step 4: Set a Firm Stance
Stand with your feet wider than shoulder-width apart to create a stable base, adjusting your position until your upper body feels supported without tiring. Keep your posture upright and your weight balanced as you guide the saw through the log. Set your feet where you can hold that position comfortably; don’t lock your knees or lean so far that your muscles tire.
A steady base helps you control the saw and respond if the log shifts. Avoid reaching across the wood or twisting your torso. Instead, reposition your feet before cutting so your arms stay within a comfortable working range and your body remains aligned with the saw. On a hillside, stand uphill of the log, where it’s less likely to roll toward you. Keep the guide-bar nose clear of the ground throughout the cut. If you can’t stay balanced, stop and reset your stance before continuing the cut.
Step 5: Mark Each Cut Point Clearly
Use a tape measure to mark the trunk at one-metre intervals, creating manageable sections that you can cut to firebox length later. Before you mark, place the trunk on solid, even ground and stop it from rolling with wedges or smaller pieces of wood. If you use a sawhorse, set the log firmly in its notch, then mark only where it’s supported.
Check that each planned section can fall clear of your feet. Make every mark bold and visible; you’ll need to identify it easily if you reposition the log. Keep the intervals consistent, but adjust the marks to suit the log’s support and your cutting position. Leave enough clearance beneath each cut so the guide-bar nose can’t strike the ground. Measure each section rather than estimating, and confirm the mark before starting the saw. Clear marks help you follow a controlled, predictable cutting sequence carefully.
Step 6: Move Cut Rounds Aside
After each cut, switch off the chainsaw and wait for the chain to stop before moving the round. Set the saw down in a stable spot, keeping the guide bar clear of the ground. Don’t leave it where you or another person could trip over it.
Move each round out of the cutting area before you make the next cut. Clear space helps prevent trips and gives you room to work safely. For heavy rounds, stand close, bend your knees, and lift with a straight back. Don’t twist while carrying; turn your feet instead. Ask for help with oversized pieces rather than straining.
Stack rounds securely away from the saw and work area. Place them so they can’t roll back underfoot or obstruct your next cuts.
Inspect for Hidden Nails
Inspect for Hidden Nails
Before cutting the next log, inspect its surface and ends for nails, screws, wire, or other metal.
Scan the wood and check the ends. Look for rust marks, small holes, embedded wire, and old fence or building attachments that may hide metal beneath the surface. Don’t assume a clean-looking log is clear.
Remove visible metal before you position the saw, and keep the chain away from remaining fasteners or wire. A metal strike can damage or dull the chain and trigger dangerous kickback, so don’t cut through suspected metal.
If you can’t confirm the log is metal-free, don’t use a chainsaw on it. Choose another log or have this one inspected safely by someone qualified. Take time to check each section before cutting it.
Engine Stalls Under Load
If the engine stalls when the chain meets wood, stop cutting and switch off the saw before checking the chain.
Check that the chain is sharp, correctly tensioned, and moving freely; a dull or binding chain can overload the saw. Reduce feed pressure and let the chain do the work; forcing it through a log can make the engine bog down or stall.
| Check | Action |
|---|---|
| Chain | Inspect for binding |
| Spark plug | Check condition |
| Fuel | Confirm supply |
| Mix | Follow manual ratio |
Use the petrol-and-2-stroke-oil mix specified in your manual. If the bar’s pinched, don’t restart the saw; switch it off before clearing a jam. If stalls recur, stop and arrange inspection rather than continuing to cut before using it again.
Clean the Air Filter
A clogged air filter can restrict airflow and reduce engine performance, especially when you’re cutting dusty or dirty wood. Check it, and inspect it after dusty cuts.
Before opening the cover, switch off your chainsaw and let it cool. Keep dirt away from the intake while the filter is out.
Remove dust and debris gently, following the cleaning method specified in your manual. Avoid damaging filter material. Clean or replace the filter as the manufacturer directs. If you wash it, allow it to dry before reinstalling.
Seat it, secure the cover, and check the intake for debris. Never start or run the saw without its air filter installed; doing so can expose the engine to dirt and cause damage. Restart when the filter is clean, dry, and properly fitted.
Conclusion
Before you start, inspect each log for hidden nails, check chain tension, and clear brush from your work area. Wear chainsaw protective gear, then identify compression and tension so you can plan each cut safely.
Keep a stable stance, control the saw, and move cut rounds aside only after the chain stops. If the engine stalls under load, stop and clean the air filter before continuing. Never rush; your deliberate cuts protect you and others.