How to Build a Sawbuck for Cutting Firewood at Waist Height
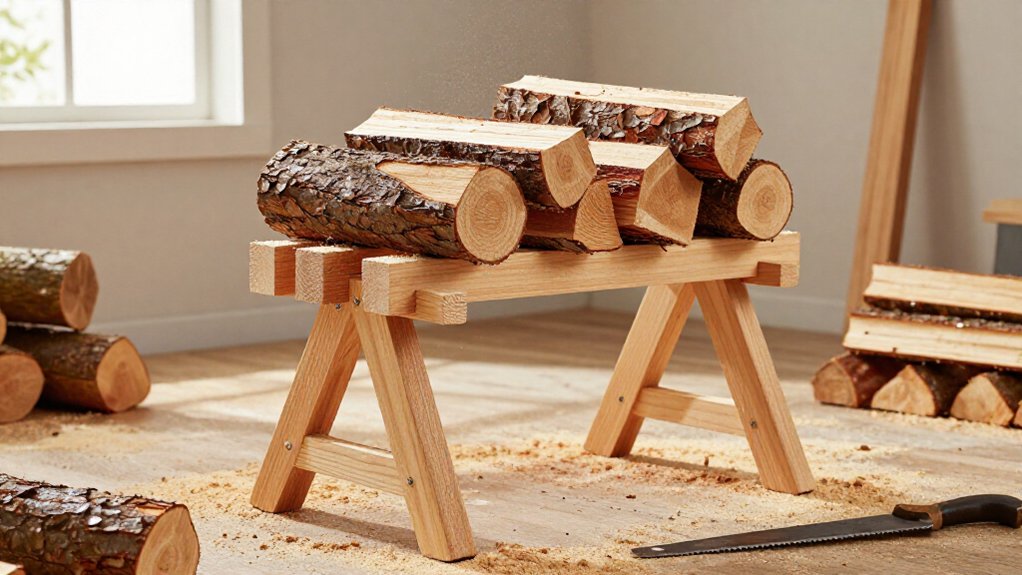
Build a waist-height folding sawbuck from six four-foot pressure-treated 2×4s. Cut legs with 30-degree ends; drill centered 3/8-inch pivot holes 18 inches from square ends.
Use three 4-inch bolts with washers and nuts, plus screws. Set braces to your target height; add lower cross-braces and scrap plywood, clear of joints. Seal cut ends.
Load-test on level ground with a heavy log. If it wobbles, remove the log and fix it. Store under cover. More checks help.
Sawbuck Height and Stability
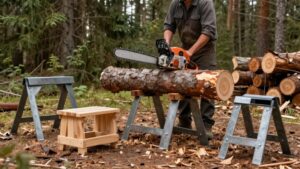
Set the sawbuck near waist height to reduce back strain; on a folding 2×4 design, 4-foot legs provide a starting point, but brace placement affects the finished height. For 30° legs, set braces 19 inches from the square ends; this helps the feet sit properly and keeps the sawbuck from sitting too low.
Align the three cross-pieces and attach each brace across all three legs with two screws per leg to limit racking and wobble. For chainsaw work, use a wide, well-braced base on firm, level ground; an unstable sawbuck can tip if the saw kicks back.
If you adjust height, reposition braces or add an adjustable chain between the outside legs. Before cutting, check that the feet sit flat and the frame opens securely.
Choose Lumber and Hardware
For a folding sawbuck, choose eight 4-foot 2×4s—six for the legs and two for the braces; three 8-foot boards can supply the lumber for under $10, and suitable scrap can lower the cost. Choose pressure-treated boards if your sawbuck will live outdoors; they resist weather better. Untreated lumber works when that’s what you’ve got, but inspect each board for splits, rot, and severe warping before cutting.
- Gather three 4-inch bolts, nine washers, three nuts, and eighteen 3½-inch screws for the joints and braces.
- Use carriage bolts on the outside legs; their heads sit flush against the wood.
- Check bolt length before assembly so threaded ends won’t project far enough to catch a saw if a log shifts. Keep hardware dry until you’re ready.
Step 1: Set Aside Scrap Plywood
Scrap plywood can stiffen the legs and steady the frame without making the sawbuck too heavy to fold and carry.
Set aside scrap plywood for each leg pair. Cut it to fit, but keep its edges clear of moving joints and the cutting area. Spread construction adhesive between plywood and legs, then secure it with screws, nails, or staples. Choose fasteners that won’t protrude and snag your hands or firewood.
Leave clearance for the legs to swing freely. If a joint feels too loose or tight after assembly, use washers to adjust spacing; wood may swell or wear. For storage, add a carrying or hanging hole in the plywood or frame, away from joints and fasteners. Smooth sharp edges, and check that the folded frame still moves freely.
Step 2: Drill Pilot Holes for Bolts
Mark each bolt location 18 inches from the square end of each angled leg, centered across the 2×4’s width. Before drilling, clamp each leg securely to a stable work surface and wear eye protection. Use a square and pencil to mark the center line across each board. Check your measurements, then make a starter dimple at each mark to keep the bit from wandering.
Drill a 3/8-inch pilot hole at every mark, holding the drill perpendicular to the lumber. Keep each hole centered so paired legs can pivot evenly. Drill these pivot holes before attaching plywood or braces, while you can reach the joint cleanly. At assembly, place washers at the joints to maintain spacing and accommodate changes from swelling or wear.
Step 3: Install Waist-Height Cross Braces
With the legs assembled, install waist-height cross braces to set the sawbuck’s working height and support its frame. For a 30-degree folding design, mark brace positions 19 inches from the square ends so the feet can sit properly. Mark matching positions across all three leg assemblies. Place the first brace across them, pre-drill, and drive two 3½-inch screws into each leg.
Install the second brace on the opposite side of the other legs; offsetting braces keeps the frame foldable. If you’re building taller, adjust brace placement; another design sets braces 25½ inches from the legs’ long points. To reduce wobble and racking, add 26-inch lower cross-braces about 2 inches above ground. Check for splits, clamp braces, and keep your hands clear while driving screws.
Step 4: Attach the Angled Leg Assemblies
Once you’ve cut the six 4-foot 2×4 legs with 30-degree ends, pair them with their long points facing opposite directions and clamp each pair to check alignment and opening.
Mark the bolt location 19 inches from each square end, centered across each board. Clamp each pair securely, then drill a 3/8-inch hole through both boards at the mark. Wear eye protection and keep your hands clear of the bit.
Fit a 4-inch bolt through each pair with a washer on each side. Add a nut or wing nut, and tighten it just enough to hold the legs together while letting them pivot. For larger logs, choose a wider angle, such as 45°. Set aside the other two boards for braces.
Step 5: Test-Fit the Cutting Notches
Before duplicating the frame, temporarily fasten one X-shaped end with two nails or screws and test its V-shaped notch with the logs you plan to cut. Set the notch’s width and depth to match your wood. A 30-degree leg angle gives about a 14- to 15-inch top opening; choose a 45-degree angle for larger logs. Test with the saw you’ll use: raise the X’s center for chainsaw clearance, or set it about 20 to 24 inches high for bow-saw work.
Keep your hands clear, and stabilize the trial frame before placing a log in the V. Check that short pieces remain supported; add a trough or floor if firewood-sized pieces could slip through. For a three-X sawbuck, test the gaps with your intended firewood length and narrow one if needed. Then secure both ends before cutting with your saw.
Step 6: Seal the Cut Ends
Brush an outdoor wood sealer onto the sawbuck’s cut ends to help keep moisture out. Work in a ventilated area, and protect your skin and eyes as the product label directs. Choose a sealer rated for outdoor use, and check that it’s suitable for your lumber.
If you’ve built with pressure-treated wood, follow the manufacturer’s instructions for an approved product and its required drying time. Apply an even coat to exposed ends, without letting liquid pool around joints or hardware. Keep the sawbuck in a spot while the coating dries.
Don’t handle it with wet sealer, and keep it away from flames or heat sources if the label warns of flammability. Let every cut end dry fully before you use or store the sawbuck.
Load-Test With a Heavy Log
Set the sawbuck on level ground and confirm all four feet sit flat, then place a heavy log in the V before cutting. Watch whether the log stays seated without rolling or shifting, and check the frame for wobble or racking under its weight. Inspect the cross-braces and fasteners while the log rests in place; they must remain secure. Keep folding joints clear to move as designed, and don’t clamp or bind them during the test.
If the frame moves, remove the log and don’t use the sawbuck until you’ve corrected the problem. A 30-degree leg angle with braces set 19 inches up has been reported to sit better than a 20-inch brace position, but test your own build on firm, level ground. Never use a lightweight or unstable stand for chainsaw work: a shifting log or tipping frame can quickly cause serious personal injury.
Troubleshooting Wobbly Legs
If your sawbuck wobbles, check it on a flat surface and make sure all four feet sit firmly. With 30° legs, shift the brace position from 20 inches to 19 inches if the feet spread too far. Test spacing and brace placement in a temporary assembly before you fasten anything permanently.
| Problem | Fix |
|---|---|
| Feet don’t contact | Adjust brace position |
| Side sway | Add diagonal braces |
| Folding blocked | Brace opposite pairs |
| Loose joints | Pre-drill; use two 3½-inch screws per leg |
Place lower braces across the legs, about 2 inches above the ground; one builder used 26-inch braces on both sides. Attach braces to opposite leg pairs on opposite sides, preserving the folding action. Keep hands clear while checking stability, and don’t cut wood until the frame stands firm.
Store Under Cover
Store Under Cover
After firewood season ends, fold the sawbuck to save space and store it indoors or under cover to protect it from rain and weather. Before you put it away, inspect the joints and hardware, and clear off sawdust and dirt. Let damp lumber dry fully; trapping moisture under a cover can encourage decay.
Apply a wood preservative, such as Thompson’s Water Seal, following the product label and allowing the finish to dry before storage. Tom treated his frame. Fold the frame only when it’s stable and clear of tools, then secure it so it can’t swing open or fall. Choose a dry indoor spot when possible.
If you must store the sawbuck outdoors, place it beneath a roof or waterproof cover, keeping the cover from trapping moisture against the wood. Pressure-treated lumber can help resist rot and insects, especially outdoors, but still inspect the frame before each use.
Conclusion
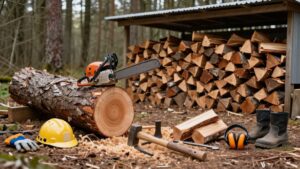
Once your sawbuck stands firm and passes a cautious load test, you’re ready to cut firewood at a comfortable height. Keep each log secure, stay clear of the saw path, and wear eye and hearing protection. If the frame shifts, stop and tighten or reinforce it before continuing. Don’t leave the buck exposed to rain; store it under cover to limit moisture damage and extend its useful life. A steady setup makes each cut safer.