How to Cut Logs on the Ground With a Chainsaw Without Hitting Dirt
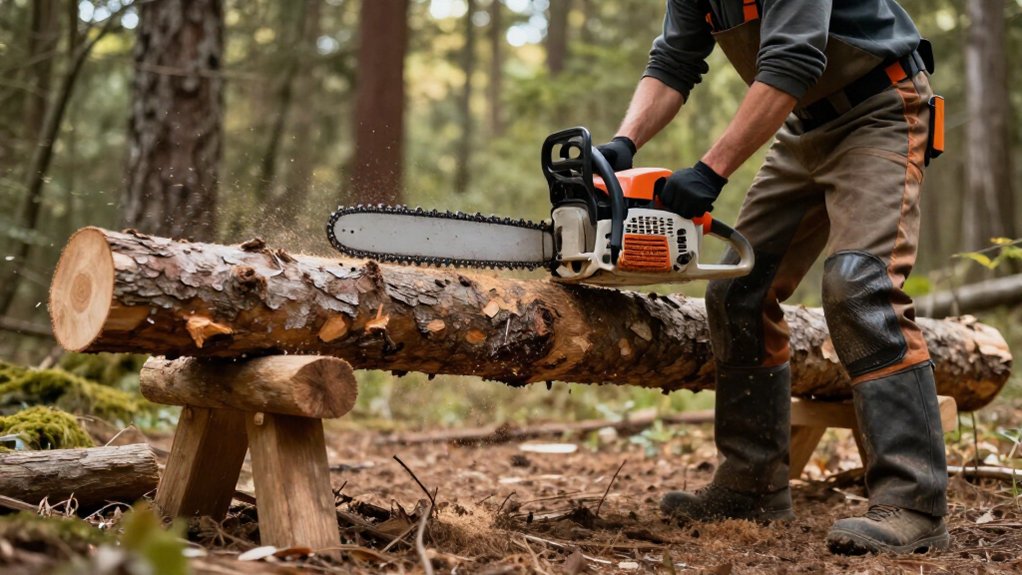
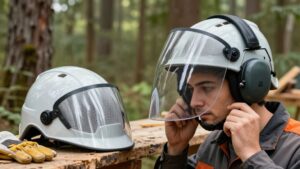
To keep dirt off your chain, secure the log against rolling on stable supports and mark your cut. Before starting, test the chain brake as your manual directs, and wear chainsaw PPE.
Make a shallow top kerf, then cut about three-quarters through without letting the bar reach soil. Stop the saw before repositioning the log or inserting a plastic wedge; finish from the opposite side.
Inspect each cut face for grit; more safeguards follow below.
Preventing Chain-Dirt Contact
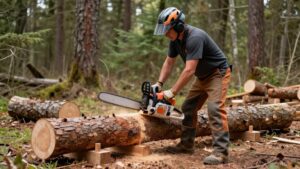
To keep the chain out of the dirt, mark cut points at one-metre intervals and secure the trunk against rolling with wedges or small pieces of wood on firm, level ground. Keep the saw above each mark and cut about three-quarters through from the top.
With the trunk secured, turn it over and finish each cut from the opposite side, keeping the chain clear of soil. Check that sections can fall without striking your feet. If the ground is uneven or won’t hold the log steady, use a stable cutting stand with a V-shaped groove to support it above ground and prevent rolling. Keep each pass controlled so the bar won’t dip below the log into soil.
Check the Chain Brake Function
Even with the log secured above the soil, check the chain brake before cutting. Follow your saw’s operating manual to test engagement and confirm the chain stops completely. A brake that engages but fails to stop the chain isn’t functioning as specified.
- Engage the brake before inspecting or repositioning the saw.
- Keep it engaged while placing a wedge or removing a stuck saw.
- If the brake fails the test, stop; don’t use the saw until a qualified repair restores its function.
Checks matter: a snag can cause serious injury. Keep your hands clear of the chain during testing, and follow the manual’s method. A working brake adds protection, but it can’t replace controlled cutting technique or required personal protective equipment.
Step 1: Elevate Logs on Supports
Before bucking a log, raise it on a stable cutting stand or timberjack so the guide bar can pass through without striking the ground. A timberjack lifts the trunk enough to keep your chain clear during the final part of a cut. That clearance matters: if the bar hits soil, dirt can dull cutters quickly and damage the chain. A supported log also reduces the chance of pinching the bar, which can trigger kickback when you try to free it.
Check that your stand rests firmly on even ground before you start the saw; a rocking support can shift under load. Reposition the support as the log shortens, and keep each cut section from dropping onto your feet. Choose supports rated for this load.
Step 2: Position Logs on Supports
Set the log so it can’t roll or shift as you cut. On firm, level ground, wedge the trunk against a stop or brace it with smaller wood pieces. Don’t rely on friction alone; a log can move under chain pressure.
If you’re using a cutting stand, choose a V-shaped notch that fits the trunk, then seat the log firmly. Check that the notch and stand won’t rock or slide. Place supports to hold sides of the intended cut, keeping the section from dropping, rolling, or pinching the bar as the wood separates. Adjust support spacing for the log’s length and weight; supports must stay stable.
Before starting, test the setup with a push. Keep cut sections clear of your feet and escape path.
Step 3: Shallow Top Kerf First
With the log secured against rolling, mark the cut and make a shallow kerf from the top, stopping well before the bar could reach the ground. On solid, even ground, use wedges or short pieces of wood to keep the trunk from shifting. Check that supports sit firmly and won’t slide when the chain enters the kerf.
Ease the chain into the top fibers and let the saw cut. A shallow, straight kerf gives you a reference and limits how deeply the bar can travel near soil. Pause if the log moves, the kerf closes, or the saw binds; reset the supports before continuing. If the ground is uneven or soft, use a stable cutting stand to keep the chain clear of dirt and reduce back strain.
Step 4: Finish the Cut From Below
Once the top cut reaches about three-quarters through the log, secure it against rolling with wedges or blocks, then roll it over and finish from below. Before turning it, verify the wedges or blocks hold the log firmly; a shifting log can pinch the bar. If it’s too heavy or awkward to roll safely, don’t force it; use a stable cutting stand. Keep both hands on the saw and complete the kerf from below.
Ease through the final fibers; don’t force the saw or trap the chain. Keep the bar clear of the ground: even brief contact can drive grit into the cutters and quickly blunt the chain. Stay alert for sudden movement. Keep your footing secure.
Step 5: Rotate the Log for Access
Before cutting, mark each cut point and secure the log against rolling with wedges or blocks. Cut about three-quarters through from the first side, stopping before the chain can reach the ground. Then reassess the log’s balance and grip it only when the saw’s off and the log is secure. Turn it to expose the uncut underside; use a felling lever if needed, keeping your feet clear of its path.
Reposition wedges or wood supports so the log can’t roll while you finish each cut from the opposite side. Follow the marks and keep the bar aligned with the cut. Restart the saw only after repositioning. If the ground’s uneven or unstable, use a stable cutting stand instead of rotating the log there.
Step 6: Clear Sawdust From the Kerf
Pause between cuts to clear loose sawdust from the kerf; it can hide the cut line and make the saw harder to control. Keep the kerf visible as you work, and watch whether it stays open. A narrowing slot can pinch the bar, especially as the log shifts under pressure.
If you see the kerf closing, stop the saw before clearing debris or changing the log’s position; don’t force the chain through a trapped cut. Use a clearing tool or a gloved hand to lift out loose sawdust, but never reach into the kerf while the chain is moving. On ground-level cuts, clear debris around the opening. That view helps you judge how much wood remains and keep the chain from entering the dirt.
Inspect Cut Faces for Grit
After every bucking cut, inspect the cut face for embedded grit, sand, or soil, especially if the log has rested on the ground. Fine particles can abrade and quickly dull your chain, even when you can’t see much contamination at a glance. Pause the saw safely before examining the wood; keep clear of the moving chain and follow your saw’s shutdown procedure.
If you spot grit, brush or scrape it away before cutting through that area again. If contamination remains, reposition or raise the log on stable supports so the chain is less likely to touch dirt during the next cut. Recheck the exposed surface after each bucking cut; clean wood helps preserve cutting performance and lets you notice damage or uneven wear sooner.
Bar-Pinch Prevention
Clean cut faces help protect your chain, but preventing the bar from getting pinched is just as important. Read the log’s support and anticipate shifting weight.
| Support | Cut sequence |
|---|---|
| Both ends | Top, two-thirds; withdraw saw before wedging |
| Cantilever | Bottom, one-third; finish from top |
Insert a plastic wedge before wood moves, never while the saw runs. If the kerf starts closing, stop the cut. If trapped, stop the saw and engage the chain brake before wedging the kerf open. Keep steel wedges away: chain contact can damage it and throw metal shards.
Elevate logs with a timberjack before bucking; it helps prevent pinching and keeps the chain from striking dirt. Don’t force the bar through a closing cut. Stand clear of the falling end, and keep a secure stance while you reposition.
Sharpening a Dull Chainsaw Chain
A dull chain cuts slowly and can make the saw harder to control, so inspect it before you start and sharpen or replace it according to the manufacturer’s instructions.
Before you cut, put on eye protection and chainsaw PPE, then follow the saw maker’s sharpening procedure. A properly sharpened chain should cut cleanly without forcing the saw; if you must push, stop and check it rather than compensating with pressure.
Keep the cutters out of dirt while bucking logs on the ground. A brief strike can dull their edges quickly, so inspect sharpness regularly as you work, especially after any ground contact. If damage or uneven cutting remains, stop; don’t continue with a compromised chain, and replace it if sharpening won’t restore safe performance.
Conclusion
You can avoid dirt contact by supporting logs, positioning cuts so the bar won’t reach soil. Make a shallow top kerf first, clear sawdust, and inspect the cut face for grit. Keep the chain sharp; a dull chain invites pressure and heat.
Watch for pinching as the kerf closes, and never cut where the saw can strike a support. Check the chain brake before work. If anything shifts, stop the saw and reset the log.