Alaskan Mill vs Lumber Cutting Guide: Which Mill Setup Fits Your Project?
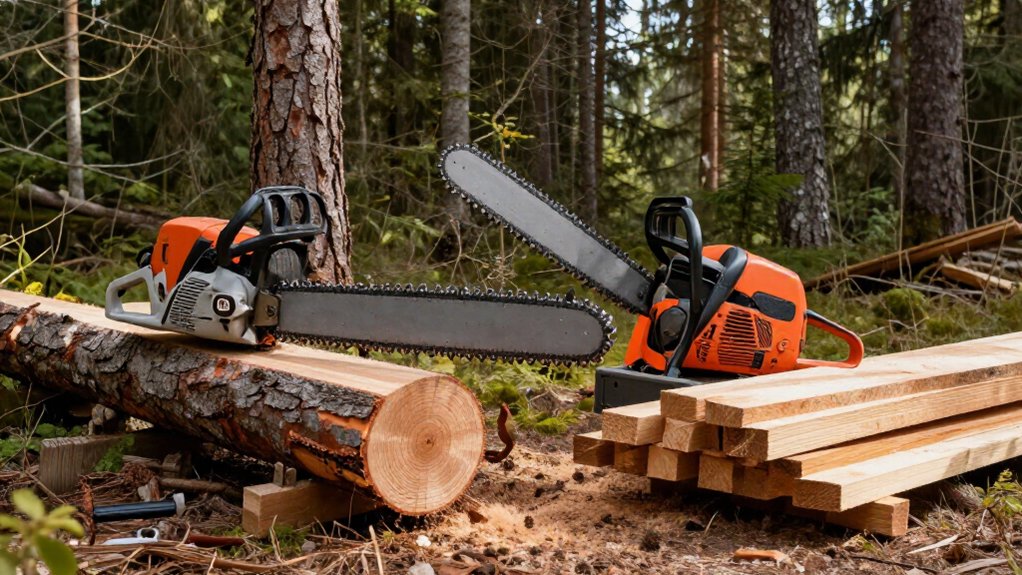
Choose an Alaskan chainsaw mill when you need portable, on-site cutting and can match your bar length to the log’s usable width.
Choose a bandsaw mill when you need greater capacity, faster production, and better lumber recovery from a thin kerf.
Before you cut, check log diameter limits, set slab thickness, align the rails, and secure the log against shifting.
Your access, budget, and slab-handling needs matter too. The comparisons below will help you settle on a setup.
Power Source Requirements
An Alaskan chainsaw mill runs on your chainsaw, so match the saw’s power and bar length to your logs, and follow the manufacturer’s bar-length guidance. More powerful saws generally mill faster, but you’ll also need adequate bar oil; longer bars require more lubrication. With a 36-inch bar, you may use nearly as much oil as gasoline, so plan to refill both after each cut. A bandsaw mill supplies a dedicated sawhead and power source, with engine power set by the model.
| Setup | Power source |
|---|---|
| Alaskan mill | Your chainsaw |
| Bandsaw mill | Dedicated sawhead and engine |
For example, Woodland Mills offers 7 to 9.5 HP on the HM122 and 21 HP on the HM136MAX. Choose capacity and power for your log size and milling frequency.
Slab Thickness Settings
Once you’ve matched the power source to the job, set the mill’s cutting height to the slab thickness you want before each pass; about 2.5 inches is a common choice. Before choosing, account for lifting capacity and storage space: thicker slabs weigh more and demand more handling effort. Mark thickness targets before you begin cutting.
- After the first cut, remove the guide rails and top slab, then reset the mill for the next pass.
- Keep the height unchanged across parallel passes when you need boards of consistent thickness.
- If you’re making slabs, plan each height change before lowering the mill onto the log.
- Consider cutting through the pith so the center isn’t left in one slab, which can reduce large central splits during drying.
Cut Quality and Kerf Thickness
Cut quality and kerf thickness determine how much usable lumber you get from each log. A bandsaw mill’s thin kerf removes less wood per pass and produces less sawdust than an Alaskan chainsaw mill. That difference matters when you cut valuable or figured logs, where lost wood reduces recovery. Bandsaw mills leave cleaner, more consistent surfaces, helping you produce accurately dimensioned boards or finish partially milled stock.
An Alaskan mill cuts with a ripping chain that follows the grain. Compared with a regular chain, it can cut faster and leave a smoother surface, but its wider kerf consumes more wood. Choose it when portability or log access outweighs lumber recovery. For high-value stock, a thin-kerf bandsaw can preserve more material for finished boards.
Setup and Alignment Accuracy
Thin kerf preserves more wood, but accurate setup determines whether each board comes out flat and consistent. Before your first cut, fasten two straight 2×4s or 2×6s to steel brackets at the log ends. Extend the rails beyond both ends so your mill remains supported throughout the pass. Check rail level at several points; taper or uneven surfaces can distort the first face.
- Set cutting height to clear rail fasteners.
- Use the new flat face to guide careful height adjustments.
- When you turn the log 90 degrees, square replacement rails with a carpenter’s square.
- For a bandsaw, match log dimensions to sawhead and track capacity; extensions increase workable log length.
A stable, square reference keeps later boards consistent and limits correction during milling.
Remote Site Access
When a dedicated sawmill can’t reach a remote site, an Alaskan chainsaw mill lets you process logs where they fall, avoiding the effort of hauling whole logs. If you already own a chainsaw, the mill keeps upfront cost relatively low and packs more easily than a bandsaw mill. Choose a bar length and mill capacity that match the logs you expect to cut on-site; your bar sets the maximum practical width.
This setup suits occasional projects because chainsaw milling progresses more slowly and demands more physical effort than bandsaw milling. Cut logs into partially finished lumber at the site, then move those pieces more easily for drying and final board cuts. Check the route, footing, and room to handle long stock safely; remote convenience won’t compensate for an unsuitable bar or unstable setup conditions.
Fuel Consumption per Board Foot
Fuel use per board foot varies too much with log size, wood species, chain sharpness, and cutting technique to support a reliable universal rate. Instead, track fuel and oil against each finished cut, then compare similar logs and dimensions. A 36-inch-bar setup may consume nearly as much bar oil as gasoline; one operator refills both after every cut.
Use these measures:
- Record cut duration; a professional Stihl 661 often needs 10 to 15 minutes, depending on log size.
- Note board-foot yield from each cut.
- Compare saw power: stronger saws generally cut faster; smaller saws can spend longer—and burn more fuel—on equal volume.
- Treat bandsaw mills as potentially more efficient because their kerf is thinner, but don’t assume fuel savings without measurements in your trials.
Bar Pinch and Kickback
A bar pinch occurs when the kerf closes around the chainsaw bar, often because the log shifts or sags under poor support. Secure the log against movement and support it so it can’t shift or sag as you cut. As the kerf advances, place wedges behind the saw to hold the opening clear. If the bar gets trapped, stop the engine before you try to free it. Don’t force the saw out or restart it while the bar remains pinched; sudden release can trigger a hazardous reaction.
Kickback can occur if the bar’s nose contacts wood or another object, so keep the nose clear and maintain a controlled grip while milling. Wear chaps, hearing protection, eye or face protection, and gloves; follow the saw manufacturer’s safety instructions.
Log Diameter Limits
Your Alaskan mill’s maximum cutting diameter depends mainly on guide-bar length and usable cutting width. Leave room for the bar-tip sprocket, so you can’t cut a log as wide as the bar’s full stated length. Check your mill’s rated capacity before choosing a log.
Maximum Cutting Diameter
Maximum cutting diameter depends on the mill’s usable cutting width, not just the length of the log. For an Alaskan chainsaw mill, compare the log’s diameter with both your guide bar’s reach and the mill’s usable width; leave room at the bar tip for the sprocket. The Granberg MKIV, for example, adjusts to a 32-inch cutting length.
- Match the mill’s stated cutting width to your intended log diameter.
- Confirm tip clearance; a nominal fit without sprocket space won’t work.
- For bandsaw mills, verify the sawhead-and-track limit in the manufacturer’s specifications.
- Compare model ratings: HM122, 22 inches; HM126MAX, 26; HM130MAX, 30; HM136MAX, 36.
These ratings help you select capacity without assuming similar-looking mills accept the same diameter. Check the exact model before buying or milling.
Bar Length Considerations
Bar length sets the practical diameter limit for an Alaskan mill because the bar’s usable cutting length must span the log. Choose a bar long enough for your planned logs, but don’t treat its stated length as usable capacity. The tip’s sprocket occupies space, and the mill’s clamps and attachment points reduce the cutting span further.
Match the mill’s rated capacity to that remaining length; for example, the Granberg International MKIV adjusts to a maximum 32-inch cutting length. Check your chainsaw manufacturer’s bar-length guidance, too: longer bars need more lubrication, and a 36-inch bar may require you to refill bar oil after every cut. If your logs exceed your setup’s reach, consider a larger-capacity bandsaw mill, whose limits depend on its track and sawhead.
Best Setup for Live-Edge Slabs
For wide live-edge slabs, you can use a bandsaw mill like the HM136MAX for logs and cuts up to 36 inches wide; a chainsaw mill costs less and travels on-site, but its bar and setup limit width. Plan cuts to keep the pith out of any single slab, reducing the risk of a center split while preserving the natural edge. For stable cuts and even drying, seal the ends and stack slabs flat off the ground with ¾- or 1-inch stickers; account for the weight of thicker slabs when planning to move them.
Slab Width Capacity
An Alaskan chainsaw mill’s usable slab width is less than its bar length because you must leave clearance at the tip for the sprocket.
You should size the bar and mill for the widest log section you plan to cut. Don’t treat log diameter and cut width as interchangeable: diameter describes the log’s size, while cut width sets your slab limit.
- Measure the widest log section before choosing your setup.
- Allow for tip clearance; usable width falls short of bar length.
- For slabs up to 36 inches wide, consider the HM136MAX; it handles logs up to 36 inches in diameter.
- The HM130MAX cuts up to 30 inches wide; the HM126MAX supports up to 26 inches.
Verify both capacities against your target log before buying equipment.
Grain and Edge Quality
To preserve a log’s natural edge in a live-edge slab, use an Alaskan chainsaw mill to cut to your chosen thickness. A ripping chain follows the grain and can leave a smoother surface than a standard chain, reducing cleanup before finishing. Keep the slab’s natural edges intact as you mill; trimming them removes the irregular profile that defines a live-edge piece.
Chainsaw-milled slabs are commonly about 2.5 inches thick. Choose greater thickness only when the design requires it, since extra material increases weight and makes handling harder. If you prioritize cleaner, more consistent cuts and less sawdust, a bandsaw mill may suit your project better. After milling, use a moisture meter to track drying progress before you begin final woodworking and confirm it’s ready.
Setup for Stable Cuts
A stable first cut starts with two straight 2×4 or 2×6 slabbing rails secured to brackets at the log’s ends. Extend each rail beyond both ends so your mill remains supported through entry and exit. Before cutting, account for taper: level the rails at multiple points, recheck alignment, and tighten attachments.
- Position the log to expose the grain and live edge you want in the slab.
- Remove branches or lumps that could catch or obstruct the mill.
- Set the mill height so the chain passes beneath all rail fasteners.
- Place wedges behind the saw when needed; they’ll keep the kerf from closing on the bar.
This setup gives you a reference plane and reduces binding risk. Verify clearance before cutting.
Portable Lumber Cutting Costs
Your main cost trade-off is upfront equipment expense versus milling time and labor.
An Alaskan chainsaw mill keeps your outlay low, especially if you already own a suitable saw. Its portability lets you mill remote logs. But you’ll spend more time and effort per board than with a bandsaw. Your cutting capacity depends on bar length: a compatible mill can use a 36-inch bar, while a Granberg MKIV adjusts to a 32-inch cutting length.
A bandsaw mill requires a larger budget, but it cuts faster and its thin kerf wastes less wood. If you mill often or process volumes, those gains may justify the cost. Compare your budget with log size, portability needs, and milling frequency. You can mill other people’s logs to help recoup equipment costs.
Conclusion
Alaskan Mill vs Lumber Cutting Guide: Which Mill Setup Fits Your Project?
Choose your mill setup by matching power, log size, and cut goals to the site—not by portability alone. Check thickness control, kerf, alignment, and bar-pinch risk before you start. For remote work or live-edge slabs, prioritize a setup you can transport and tune accurately; for repeated lumber cuts, weigh output against fuel, labor, and equipment cost. You’ll get safer, more consistent results when you test the setup on a cut.