How to Use a Vertical Lumber Cutting Guide for Straight Chainsaw Cuts
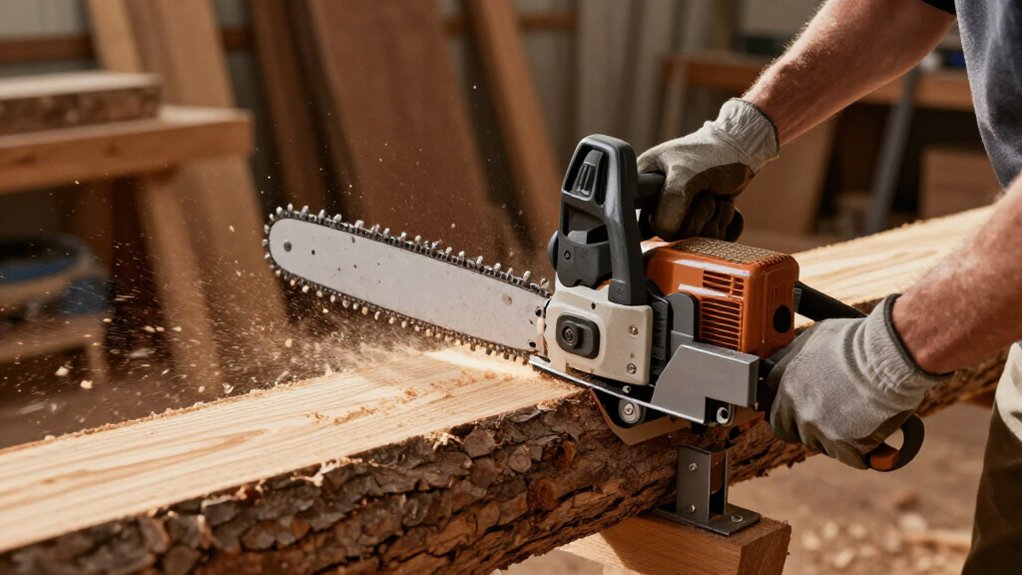
To make straight chainsaw cuts, choose your slab thickness, set the vertical guide 2 to 6 inches wide, and align it parallel to the bar, clear of the tip sprocket.
With the saw off, secure clamps and screws, then check chain clearance by hand.
Mark and secure level rails, and make a shallow test cut to confirm alignment. Keep the chain lubricated, feed steadily, and stop if binding occurs. More checks help manage thickness and finishing safely.
Preventing Blade Drift
Secure the guide firmly to the chainsaw bar, tighten its adjustment screws, and check for movement before cutting; set it to the desired width, from 2 to 6 inches, so it tracks consistently along the log. For the first cut, level and secure guide rails across the log, then run the mill against them to establish a straight reference surface. Keep stable footing and control the saw with both hands.
For later cuts, slide the guide across the newly cut face and hold it flat to help prevent blade wandering. If sawdust packs into the kerf and causes binding or an off-line cut, stop; take frequent, shallow passes to clear it and maintain the path. Resume only when you can control the saw safely.
Verify Bar-To-Guide Clearance
After setting the guide, verify clearance before cutting. Switch off the saw and secure it against starting. Check the guide’s fit and alignment, then inspect the full chain path; contact can cause binding, damage, or loss of control.
- Confirm the guide matches your bar length and leaves space around the tip sprocket.
- Check that the guide runs parallel to the bar and that no fastener projects into the chain path.
- Move the chain by hand along the bar. Stop if it catches, binds, or touches the guide, screws, or other hardware.
- Recheck the entire clearance after changing guide width; its adjustment range is 2 to 6 inches.
Correct any interference before powering the saw. Don’t assume clearance remains adequate after adjustment, and keep your hands clear of cutting teeth while handling the chain. Inspect both sides of the bar, including near the nose. If parts shift during the check, stop and retighten them, then repeat the hand-movement test before operation again.
Step 1: Mark Your Cut Line
Before marking, inspect the log’s grain and surface, and remove branches or raised lumps that could obstruct the guide. Choose slab thickness before you mark: about 2.5 inches is a typical target, while the guide adjusts from 2 to 6 inches. Confirm the selected thickness suits your intended board and the log’s dimensions.
Then mark a clear cut line along the log to show where the vertical guide should travel. For the first cut, align the line with the planned guide-rail path, and check that the rails sit level across the log. Keep the cut path below every rail fastener, including lag bolts, so the moving chain can’t strike metal. Use a visible, continuous mark that remains easy to follow during setup and cutting.
Step 2: Clamp the Guide Securely
With the guide parallel to the chainsaw bar, clamp or fasten it firmly so it can’t shift during the cut.
Tighten the guide’s screws evenly; uneven pressure can pull it out of alignment and affect lumber thickness. If you use guide rails for the first cut, secure them to the log with lag bolts, then check each fastener for movement.
Before starting the saw, inspect the guide assembly. Confirm it stays seated and doesn’t obstruct the chain or tip sprocket. Keep your hands clear of the chain while checking, and follow the saw manufacturer’s shutdown and handling instructions.
If the guide loosens or shifts, stop and recheck its fasteners before proceeding. A secure, aligned guide helps maintain consistent lumber thickness and a straight cut.
Step 3: Make a Shallow Test Cut
Set the guide to your desired cutting width, then make a shallow test pass with the bar nearly parallel to the log. Keep the first passes shallow to limit sawdust buildup inside the kerf; packed debris can bind the bar or pull the cut off line.
Watch the guide and cut as you complete the test, confirming that the guide remains aligned and the kerf tracks straight. Don’t increase cutting depth until both checks are satisfactory. If sawdust starts packing into the kerf, reduce the pass depth and clear the cut as needed before continuing. Stop the saw before clearing debris or adjusting the guide.
Step 4: Steady, Controlled Saw Feed
Once the guide is aligned and secured, feed the chainsaw steadily along it without forcing the cut; a controlled pace helps keep the slab even and the kerf on line.
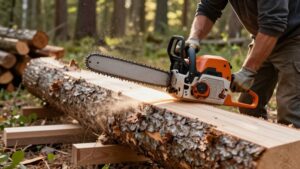
For a first cut, secure level guide rails to the log, tighten their screws, and place the mill below the fasteners. On later cuts, seat the guide on the previous cut’s flat surface and set it for the desired slab thickness. Keep both hands on the controls and maintain footing.
Let the chain cut; don’t push to accelerate it. If sawdust packs into the kerf and causes binding, ease the feed and take frequent shallow passes to clear it. Don’t twist the bar or force it through resistance; stop if you can’t maintain control.
Step 5: Recheck Alignment After Each Cut
After each cut, stop the saw and check that the guide remains parallel to the bar and aligned with the fresh surface before starting the next pass. On your first cut, watch guide rails for movement. For later cuts, use the flat, freshly cut face as your reference; don’t assume the guide stayed fixed.
Inspect its screws and nuts for looseness, and verify that the adjustable guide still matches your intended cutting width, between 2 and 6 inches. If the guide or bar has shifted, stop the saw and realign the setup before continuing. Don’t steer the bar mid-cut to compensate for drift: that can produce an uneven surface and compromise control. Resume only when the guide and bar are stable and correctly aligned.
Step 6: Seal Freshly Cut End Grain
Apply end sealer to each slab as soon as it’s cut, before the exposed end grain loses moisture rapidly. First, shut off the chainsaw, engage its chain brake, and move the slab to a work area. Brush a waxy log-end sealer over both freshly cut ends, covering the end-grain surface with a coat. If you need a lower-cost option, use latex paint instead, following its label and ventilation precautions.
The coating slows moisture loss through the ends, helping moisture escape more evenly through the slab during drying and reducing the risk of drying cracks. Don’t treat sealing as a substitute for drying practice: stack slabs and maintain airflow. Continue checking slab moisture with a meter; sealer slows drying but doesn’t stop it.
Measure Board Thickness After Cutting
With the chainsaw off and the slab stable, measure its thickness at several points along its length using a ruler or caliper, and record each reading to check for consistent cuts.
Compare each reading with your intended setting; the guide adjusts for cuts approximately 2 to 6 inches wide. If measurements vary, verify that the guide stayed aligned and its screws remained secure during cutting. For two-inch slabs, measure after cutting, then repeat measurements as the wood dries, since drying can change dimensions.
Keep readings labeled by board and location so you can compare boards and track thickness changes. Don’t rely on a measurement or force the tool while checking; set it on a stable surface and keep the chainsaw switched off.
Diagnose Pinched Saw Bar
If the kerf closes around the bar and the saw stops advancing, the wood may be pinching it. Stop the saw before freeing a trapped bar; forcing it can damage the chain or throw the saw off your cutting line. Use wedges in the kerf to hold it open, and confirm the log is supported so its weight won’t close the cut. Sawdust can also bind the bar. Clear the kerf and take frequent, shallow passes. Keep your cutting guide aligned; check for movement, since an off-line cut can bind the bar.
| Cue | Check |
|---|---|
| Bar stalls | Stop saw |
| Kerf closes | Insert wedges |
| Log shifts | Check support |
| Binding persists | Clear sawdust |
Then resume cautiously.
Lubricate Guide Rails Regularly
During milling, keep the chainsaw bar and chain properly lubricated; a longer bar needs more oil, and insufficient lubrication can overheat the saw.
Before each cut, check that the bar-oil reservoir has enough oil. For the described 36-inch-bar setup, refill the oil and fuel after every cut, before restarting. Follow your chainsaw manufacturer’s lubrication guidance for your bar length and operating conditions; don’t assume one feed rate suits every setup.
Keep the guide’s alignment screws distinct from the lubrication system: they hold the guide in position, while bar oil lubricates the moving chain. If oil flow appears weak, stop the saw and correct the problem before cutting. Wear required protective equipment, keep clear of the moving chain, and verify lubrication again after final adjustments.
Conclusion
With a vertical lumber cutting guide, you can make straighter chainsaw cuts by checking bar clearance, marking the line, securing the guide, and making a shallow test cut. Keep your hands clear, wear proper protective gear, and stop if the bar binds or pinches. After cutting, measure the board’s thickness, seal exposed end grain, and clean and lubricate the guide rails. A few careful checks help you maintain accuracy, protect your equipment, and reduce the risk of injury.